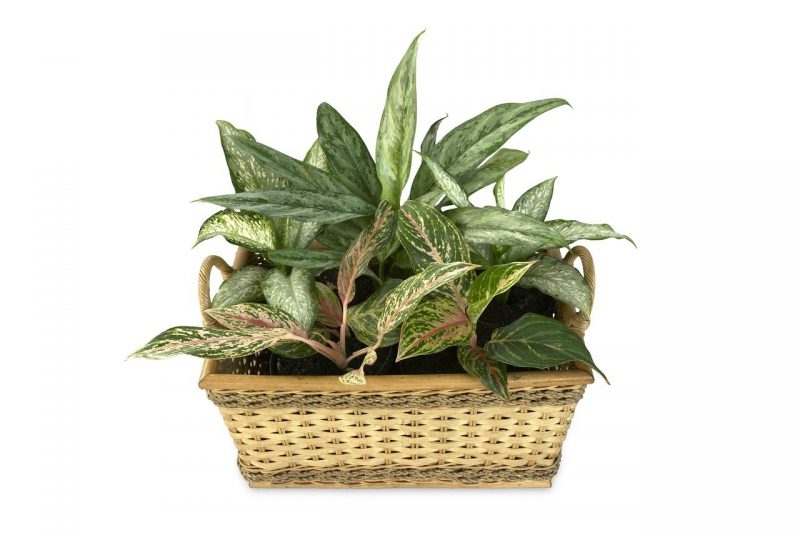
If you’re interested to learn how to propagate Aglaonema, you’ve come to the right place. These popular indoor plants are usually spotted in homes across the globe. Also referred to as the Chinese evergreen, Aglaonema is known for its strength and its ability to easily adapt to any type of environment.
Since they’re highly adaptable, you won’t have trouble propagating them in regions where the climate is mostly cold or warm. One of the best reasons why many people add Aglaonema to their indoor living spaces is the fact that their beautiful foliage can go well with any type of interior design. This plant can offer you more than 100 Aglaonema options to choose from!

4 Methods of Propagating Aglaonemas
You’ll be glad to know that the methods involved in propagating Aglaonemas are anything but complicated. You may grow this plant via stem cuttings, root cuttings, seeds, as well as tissue culture. Let’s take a closer look at each of these methods.
Method #1: Stem cuttings
Since this is the easiest way to propagate Aglaonemas, this is widely-used among those who are new to gardening. To get started, you may choose to look for new shoots that have at least five leaves or you may cut an old plant stem. Regardless of your choice, you need to make sure that the cutter is sanitized in order to ensure the health of your plants.
As soon as the cuttings are collected, be sure to plant them in a coco-peat mix or soil. Next, you need to place its container in average room temperatures, as well as in indirect sunlight. Keep in mind that your new cuttings won’t fare well if you place them in a cold area.
After a period of 25 to 45 days, expect to spot new shoots emerging from the cuttings.
Method #2: Root cuttings
Most greens aficionados agree that propagating Aglaonemas with the use of root cuttings is the safest way to go. However, this method can be a little challenging for beginners because it requires extra care. In other words, this method isn’t for the faint of heart.
When you’re using this method, you separate the mother plant with roots from a plant. The new plant is placed in the new container and kept in a place where it can get indirect sunlight. Within 5 to 10 days, the new plant will quickly build its own roots.
It’s extremely important to place your new plant in an area with slightly warmer temperatures. Aglaonemas that are propagated from root cuttings are a lot similar to those that are propagated from stem cuttings because both won’t thrive in areas with cold temperatures.
Method #3: Seeds
The seeds that you use for propagating Aglaonema need to be fresh. You can collect fresh seeds from the base of your mature Aglaonema flowers. Before anything else, make sure that your seeds are washed in acidic water.
Keep in mind that Aglaonemas propagated using seeds requires you to use a coco-peat mix or seed germination soil mix. The next step is to spread the fresh seeds on top of the mix before you cover them lightly. For best results, position the container in average room temperatures where the seeds can be exposed to indirect light.
Seed germination takes an average of about 45 to 60 days.
Method #4: Tissue culture
If you need to propagate a large number of Aglaonema seedlings within a shorter period of time, then this method is the perfect way to do so. For this reason, propagating these plants via tissue culture is widely used for bulk production, as well as commercial purposes. This method is all about producing new seedlings with the use of a tiny part of the original plant’s leaves, stem, or root.
Without a lab-type environment, this propagation method won’t work because it involves tissue culture. Natural weather conditions are gradually introduced to the seedlings. Although the growth rate of your Aglaonemas is slower via tissue culture propagation, this is still the best way to produce them in bulk.
Is It a Good Idea to Grow Plants in a Semi Pro Greenhouse?
Yes, it’s definitely a great idea to grow your precious plants inside a semi pro greenhouse. Check out some of the best reasons why this is so:
Your plant’s exposure to pests and vermin becomes limited
Growing your plants inside a semi pro greenhouse will give you the peace of mind that the enclosed space limits their exposure to the threat of harmful insects and animals.
It eliminates the need for emergency preparations in case of bad weather
Setting up your very own semi pro greenhouse also means providing them with a layer of protection from harsh weather conditions that may only put all of your gardening efforts to waste. While traditional outdoor gardeners make emergency preparations before a storm or a blizzard, you can rest easy knowing that your plants are secure and protected.
You can enjoy gardening at any time
However, the best thing about giving greenhouse gardening a try is that you can be free to enjoy gardening regardless of the weather outside.
You can create the best growing environment for your plants
What’s more, since you can control the temperature and humidity levels inside your semi pro greenhouse, you can easily create and maintain an optimal growth environment for them.
Final Thoughts on How to Propagate Aglaonema
Learning how to propagate aglaonema is a must for anyone who loves this plant. Just choose any of the methods that we’ve listed above and you’re good to go.

Hello
II have propogated my cuttings about 3 weeks ago but some of the cuttings seem to be dying despite efforts not to under/over water. Any thoughts?
What color should the seed pods be when you harvest them. Mine are in various colors of yellow, orange and red?