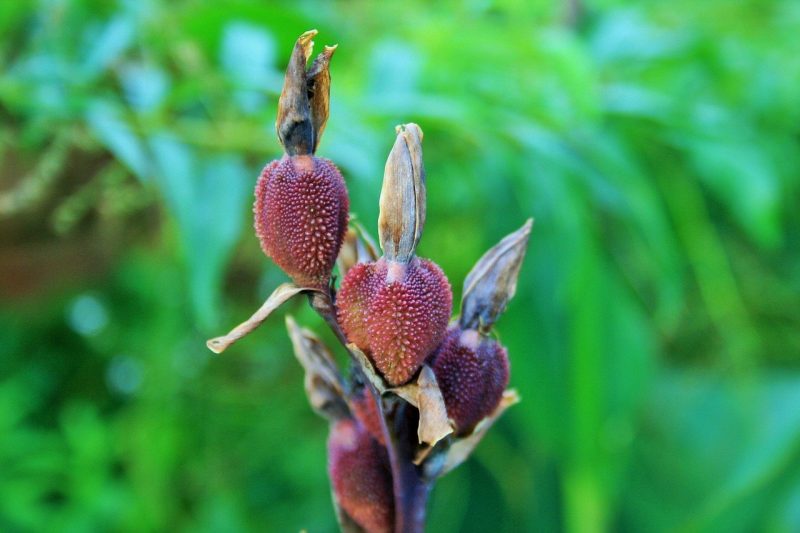
If you’re curious about how to plant canna seeds, you can tackle four steps for success. While not all gardeners like to propagate from seeds, canna plants will not give you a headache to grow this way. However, you’ll be giving yourself a headstart by starting canna seeds in the greenhouse to guarantee germination.
You can adjust the conditions in the greenhouse to guarantee the sprouting and establishment of canna plants. Check the specific needs and requirements of the cultivar that you have and adapt the greenhouse accordingly. Once established, you shouldn’t have any problem with this unique-looking perennial.

Comprehensive Guide On How To Plant Canna Seeds
Step #1. Prepare the seeds
Before anything else, you want to prepare canna seeds before sowing them to guarantee germination. This means that you want to cut an opening on the seed coat. Remember that some seeds require preparation to germinate, such as creating a small opening on the outer covering.
You can use a scalpel and scratch the outer covering. Creating an opening will make it easier for moisture to reach the seed inside and encourage sprouting. Afterward, you must place the cut canna seeds in a bowl with water.
You can start by placing the seeds in the bowl, and then pour the water at around two inches. Keep the canna seeds in this bowl of water for at least five days. However, make sure that you change the water every day to keep it clean.
Step #2. Prepare the containers
Besides the seeds themselves, you also want to prepare the containers for sowing the seeds. A small well-draining planting pot for every two seeds should be enough, and you can transplant the plants comfortably later. What medium works best for canna seeds?
You can use a growing mix, but some gardeners also use vermiculite for growing canna seeds. You want the medium to provide aeration and again, drain well. You can check out starting mixes in your nursery as well.
Step #3. Sowing and germination
Much like when starting other plant seeds, you’ll benefit from sowing canna seeds in the greenhouse. Remember that germination would be more comfortable in a controlled and stable environment, and it’s easier to achieve indoors. Iowa State University recommends sowing indoors in the middle or at the end of February.
You don’t need to sow the canna seeds deeply, but setting and pressing them on the medium’s surface should suffice. However, you want to cover them with at least ¼ inch of vermiculite to encourage germination. More so, you can assume that moisture is also necessary for them to develop, so mist the medium as well.
Step #4. Maintenance
The greenhouse will only be practical if you maintain the conditions indoors. For example, canna seeds will grow well when the temperature is around 65 to 70°F during the day and 60°F at night. Sudden changes and extreme temperatures will affect germination.
More so, moisture is crucial for germination. You want to water the container and let it drain. Afterward, always check the vermiculite and mist if necessary.
You can also cover the pots with plastic before placing it somewhere warm, and canna seeds should germinate after one to two weeks. Upon sprouting, remove the cover that helps with humidity and place the seedlings under grow lights in the greenhouse. At this point, you are waiting for them to grow large enough for transplanting in individual containers.
However, remember to harden them for at least ten days before permanently transplanting them outdoors after the danger of frost has passed.
Transplanting Canna Seedlings
As mentioned previously, it’s important to harden the young canna plants before transplanting them in their permanent location in the garden. Gently get them acclimated to sunlight in a protected site and extend the duration each day. Then, check your calendar for the frost date.
You can prepare the pots by soaking them over a shallow container for easier removal. This will prevent damages to the roots and easier separation of the plants if there are two per container. Upon planting, you must maintain moisture to help with the establishment, and you can fertilize after a week with a diluted 10-10-10 liquid fertilizer.
General care
The ideal location for cannas should provide at least four hours of light, and you can also amend the soil for planting. Gardeners often add compost and then fertilize in spring to encourage flower production. Watering will also benefit these plants but adjust according to the climate to prevent overwatering or under-watering.
Over time, you can remove the faded flowers to extend the blooming of your canna plants. Once the plant itself stopped producing flowers over time, you must cut back the stems and foliage if deadheading no longer works. Gardeners also cut back by the end of fall to encourage flowering in the summer.
Conclusion
If you have canna plants, you can consider starting them from seeds. Learning how to plant canna seeds is relatively straightforward, and you can simplify the process into four steps. Perhaps the main takeaway here is the importance of seed preparation and using a greenhouse to guarantee germination.
You will need to scratch a small opening on the seed coat and soak the seeds in water first before sowing them indoors. Then, press the seeds on the vermiculite and ensure soil moisture and consistent indoor temperatures. The seeds should sprout in a week, and you can acclimate them for transplanting.
