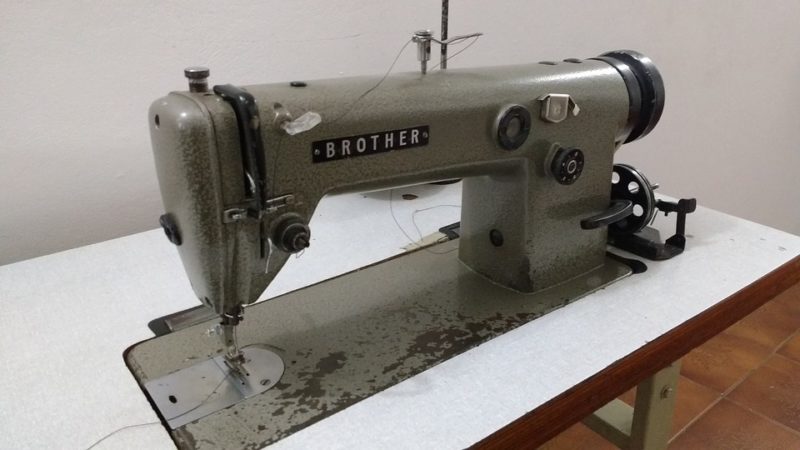
There are four steps to learn how to use a Brother sewing machine, and we’ll start from the beginning up to sewing. We’ll also share tips when setting a Brother sewing machine. But besides knowing the proper usage of a sewing machine, it would help you learn what to do when it jams.
We have a separate discussion on how to unfreeze a sewing machine that you can read for this common issue.

How To Use A Brother Sewing Machine For Beginners
Step 1. Familiarize yourself with your Brother sewing machine
- Study the manual of the specific Brother sewing machine model you have, but if you can’t find it, go to Brother’s website and get a copy
- Inspect all the parts of the sewing machine to know if nothing is missing or damaged
- Prepare a spool of thread, scissors, scraps for practicing, and cleaning materials like a cloth and a brush before you begin setting up and using the Brother sewing machine
Step 2. Wind and install the bobbin
- Check if there is already a preloaded bobbin in your Brother sewing machine, and if not, wind the bobbin yourself
- Place and secure the spool of thread on the spool pin and wrap the thread through the guides at the top of the Brother sewing machine
- The holders at the top of the sewing machine have an order that you can find on the manual
- Guide the end of the thread to the pin on the top of the Brother sewing machine with the bobbin
- Thread through the bobbin a couple of times before locking it in place
- Apply a bit of pressure on the machine’s pedal to allow the thread to wrap around the bobbin
- Load the bobbin accordingly, typically on a designated case
- Adjust the needle to end up with two thread ends close to the presser foot
Step 3. Thread the Brother sewing machine
- Place the spool of thread in its spool pin securely
- Refer to the Brother sewing machine manual to know how to weave the thread through the path in the correct order
- After going through the thread path, the end of the thread will be close to the needle
- Have the thread through the needle from front to back or use the automatic needle threading mechanism if your Brother model has one
- If you still don’t get how to thread a Brother sewing machine, we have an easy-to-follow tutorial that you can use
Step 4. Set the Brother sewing machine
- There are different ways to learn how to set up a sewing machine, but in general, you will put in your stitch pattern and preferred tension
- Follow the manual of the Brother sewing machine you have and then test it on a scrap fabric
- From there, you’ll know what to adjust according to how you want to work
- The best stitch to use is the straight stitch, especially when you’re just learning how to use a Brother sewing machine or any brand for that matter
How Do You Sew On A Brother Sewing Machine?
- Wind the bobbin and thread the needle of the Brother sewing machine
- Check the settings if they’re suitable for the project you’ll do
- Turn on the sewing machine and place the fabric under the presser foot
- Lower the foot onto the fabric and give the foot pedal slight pressure to start
- The pressure on the pedal will move the needle and feed the fabric through it accordingly
- If it’s your first time using a Brother sewing machine, get comfortable with simple projects such as pillowcases or anything with straight seams
- Don’t forget to experiment with various sewing projects and patterns to learn more techniques with the sewing machine
What Number Should The Tension Be On A Brother Sewing Machine?
According to Brother, you want the tension dial between 2 and 6 on your sewing machine. Ultimately, your thread and fabric will dictate the tension you’ll set on the sewing machine to ensure that your seams will be durable and your material will stay true to shape. You can also make trial stitches to know the necessary adjustments.
What is the correct tension on the Brother sewing machine?
Check if it’s only the upper thread visible on the right side and the bobbin thread on the wrong side of your project and if both threads cross close to the center of the fabric. Having the bobbin thread on the right side of the fabric means the upper thread is too tight, or the bobbin was incorrectly threaded. On the contrary, your upper thread is too loose if it becomes visible on the wrong side of the material.
How to adjust the tension on your Brother sewing machine?
Turning the tension dial clockwise will tighten the upper thread tension. However, you can’t adjust the thread tension if you didn’t thread your Brother sewing machine correctly. A dull or broken needle will also keep you from modifying the tension.
Conclusion
And that’s it! To recap how to use a Brother sewing machine, you start by reading the manual, installing the bobbin, threading the machine, and adjusting the settings. Overall, Brother is relatively easy to use.
We hope this was a helpful read, but feel free to browse our blog for other valuable tutorials for sewing machines.
