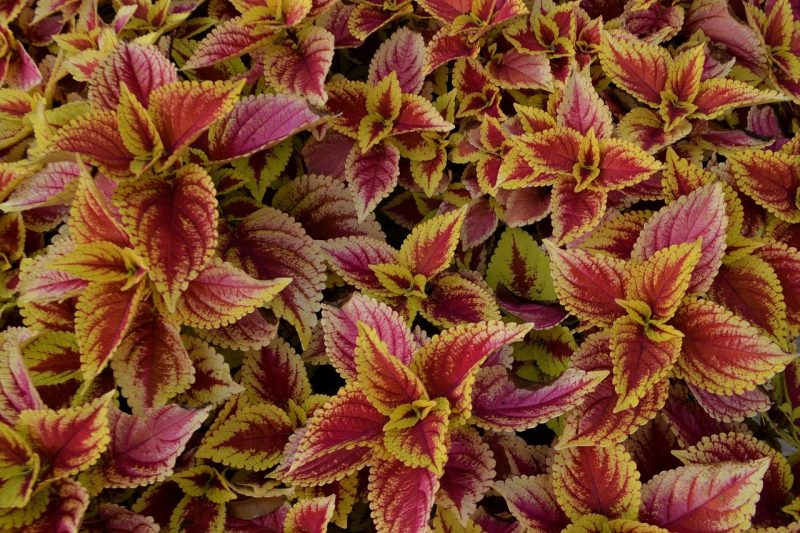
Are you wondering how to collect coleus seeds? Many gardeners love to grow coleus plants because they are versatile, and they will thrive whether you grow them indoors or outdoors in planters or containers.

A Step-By-Step Guide on How to Collect Coleus Seeds
These plants don’t need much attention and they can effectively grow from seeds, perfect for those who just started gardening. Coleus seeds are easy to collect and store even though they’re really tiny. Here’s how:
Step #1: Collect the seeds from the healthiest coleus plant
To help you identify which plant is the healthiest, tie a string on the plant. Regularly check them once the flowers on the spikes start to wither, which usually happens during the fall season. Allow the plant to dry and turn brown, the string will help you remember the strongest plants you’d like to get your seeds from.
Step #2: Harvest the seeds at the right time
You’ll know that it’s time to harvest the seeds once you see the petals fall from the flowers and the seed pods are dried and brown.
Step #3: Clip the dried seed pods using sharp and clean gardening shears or scissors
Make sure not to pull or pinch the pods or you’ll risk damaging the roots. After cutting, carefully wrap the pods in a paper towel and place them inside a paper sack.
Step #4: Store the paper sack properly
Store the paper sack in a cool, dry area. Shake the sack at least once a day so the seeds will dry evenly and won’t stick together.
Step #5: Dry the seeds
Your seeds need (at least) two weeks to completely dry. After two weeks, you can check the dryness of your seeds by pressing your fingernail. If the seed cracks or breaks, they’re ready to go. If it doesn’t, give them more time to dry; otherwise, they will most likely rot when you plant them.
Step #6: Place the dried seeds on a shallow dish
Once the seeds are completely dry, take the seeds out of the paper sack and place it on a shallow dish. Use clean tweezers to discard any leaves or debris.
Step #7: Place the seeds in a paper envelope.
Place the fully dried seeds in a paper envelope and don’t forget to label the envelope with the date and type of seeds. Do not store seeds in a plastic container because it can encourage mold growth.
Step #8: Store the seeds until spring.
Store the seeds in a cool, dark, and dry area until spring planting begins.
How to Plant Coleus Seeds
After harvesting your seeds, the next step is to plant them the next spring season. You can sow your seeds directly into the soil or in containers. Lightly sprinkle the coleus seeds over damp potting soil mix.
To spread the seeds evenly, you can mix the seeds with sand. This creates a gap between the seeds so they’ll have room to grow.
Once you’ve places the seeds in the soil, cover them with a layer of soil, and then cover the plant with plastic. It’s best to place them in a spot where they could get enough warmth and indirect sunlight.
If all goes well, you’ll be able to see seedlings form within two weeks. You should remove the plastic by then.
You can transplant your seedlings in individual containers once they have two sets of true leaves form.
How to Take Care of Your Coleus Plants
You don’t need to be a gardening expert to be able to successfully grow coleus seeds. Just remember that the soil needs to be kept moist, especially for newly planted seeds.
You may need to water containers plants more frequently. Adding fertilizer is optional, but you can give your plants a boost by adding half-strength liquid fertilizer during their most active growth period – spring and summer.
Coleus plants usually grow spiked flowers in the summer. You can keep remove these flowers if you want and pinch the shoots of younger plants to promote foliage growth.
Overwintering is another factor you need to consider. Since coleus plants are tender annuals, they’re vulnerable to cold climates. They need to be potted, dug up, or transferred indoors for overwintering.
Why Should You Grow Coleus Plants Inside a Hobby Greenhouse?
There are several benefits to growing coleus plants inside a hobby greenhouse. Here are some of those advantages:
Protection from pests and diseases
Aphids, snails, rodents, squirrels, and other pests and animals may want to eat the leaves of your plants. Neighboring diseases can easily get to them if they’re exposed to your garden. Placing your coleus plants inside a greenhouse keeps them safe from pests and diseases that could stunt their growth and eventually kill them.
Start plant growth early
With a greenhouse, you’ll be able to start planting any time. You don’t have to wait for the spring season since you can easily control the climate inside. You can use heating and cooling systems to set the temperature specific to the needs of your plants.
Protection from bad weather
Frost, ice, snow, heavy rains, and high winds can easily damage and even kill your plants, including coleus. Placing your coleus plants inside a greenhouse keeps them safe from unpredictable weather conditions.
Final Thoughts on How to Collect Coleus Seeds
Knowing how to collect coleus seeds is the first step to growing these gorgeous plants. Just follow the steps above, and you’ll be able to properly collect and store coleus seeds in time for spring planting.
