Rainy days must have given you a tough time to relax. Searching about “how to repair water damaged sheetrock ceiling” provides us with the idea that you need our help. Drop all your queries regarding your water-damaged ceilings because this article will give you precise answers!
Water can pass through almost anything, making it a severe hazard, especially to your home. You can be sure that water is seeping into your home if you observe a weird discoloration or, worse, a sagging ceiling. It’s critical to act quickly before your furniture or property suffers further harm.

Fixing A Water-Damaged Ceiling
It is critical to repair any water damage to your property’s ceiling as soon as possible. If this is not done, the structure’s integrity and people’s safety will be risked.
Knowing this, you must take urgent action to avoid future harm. Use the steps below to assist you in repairing a water-damaged ceiling.
Step #1. Find the leak to stop the water source
Water pouring behind your walls or onto the ceiling from above can be noticeable at times. Moisture, leaking water, or indicators of losing structural integrity may be seen on the top of walls.
The weight of water saturating the inherently porous gypsum substance may cause ceiling drywall panels to sag or crumble. Small indications, such as coffee-colored stains, may appear at other times and get larger over time.
You may need to remove the damaged drywall to find the source. Because water can spread, the source could be far away from the damaged ceiling region. So, once you’ve located it, perform any necessary repairs or replacements to stop the water.
Step #2. Dry affected areas
The water-damaged ceiling can then be dried after the water source has been handled. First, lay a tarp on the floor and any furniture in the room to protect them from water and debris.
Then gather things for drying the ceiling, such as fans and towels. Take your time drying the surfaces above and below the top to ensure that the moisture is completely removed. If water is still leaking after you’ve dried the ceiling, it’s still too saturated and needs to be dried more.
To dry it, you may need to cut out the areas that are still damp. If the drywall on the ceiling is bulging, pierce it to let the water out. Make sure to put a bucket underneath so it can catch the water.
Step #3. Remove the rotten sections
You should wear protective equipment like safety goggles and a face mask before continuing your task. Scrape off any pieces of the water-damaged ceiling that are peeling or bulging if you haven’t already. Other areas that have been harmed, such as those with water stains, should also be removed.
If the drywall is stained but not structurally damaged, you can save it by removing only the tainted sections. Cut out the damaged piece with a keyhole saw into a rectangle or square shape. The portion can then be readily replaced with a drywall fix later.
Step #4. Repair the ceiling
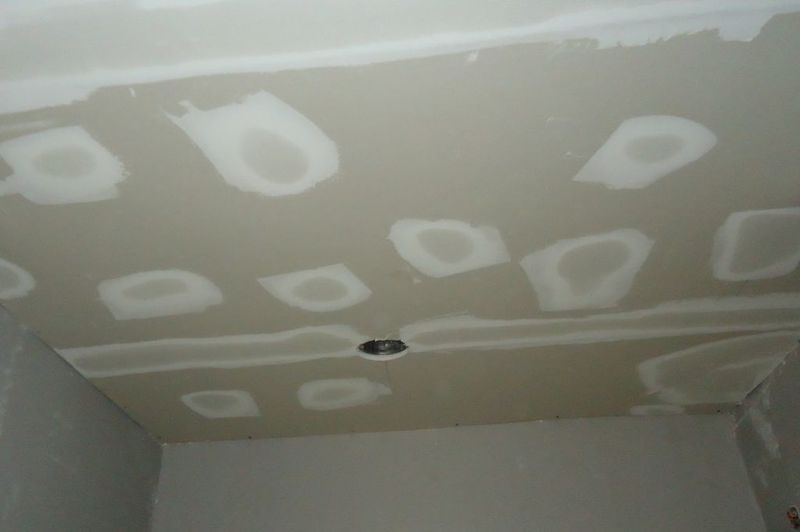
Smooth out any ridges, lumps, or rough places with sandpaper. Fill minor holes with joint compound, let it dry, and then smooth it out with sandpaper.
Measure the hole in places where you’ll be cutting out drywall. Then, to patch the hole, cut a new piece of drywall that is 2 inches bigger and longer than the hole.
Start with a piece that is larger than you need and trim it down with a utility knife. Wait for the adhesive to dry, apply a coat of joint compound, and sand it smooth.
Step #5. Prime and paint
When you’re finished with the repairs, open the windows to allow appropriate ventilation for priming and painting. Allow the primer to dry before applying it to the ceiling.
Repaint the top once it has dried.Even if the entire ceiling was not damaged, it is best to prime and repaint the top as a whole to guarantee even coverage.
Will home insurance cover ceiling leaks and water damages?
As if your life wasn’t already hectic enough, you now have a ceiling leak to contend with. Will homeowner’s insurance cover it?
That will depend on the cause of the leak in your ceiling. Homeowners’ insurance usually covers water damage if the reason is unexpected and unintentional.
As a result, if you had a severe windstorm that damaged your roof and allowed water in, there’s a strong possibility it’ll be part of the insurance coverage. Your home’s insurance is unlikely to cover a claim if your roof has not been adequately maintained.
Conclusion
A disturbance in your peaceful relaxation on rainy days is devastating. Water-damaged ceilings are a pain in the neck because it is costly to have them repaired. That is why maintenance is a must in our home sweet home.
Plus, it is indeed advisable to discuss with a lawyer to guarantee insurance coverage from insurance companies. Then, you wouldn’t have to go searching for content on how to repair water damaged sheetrock ceiling.
