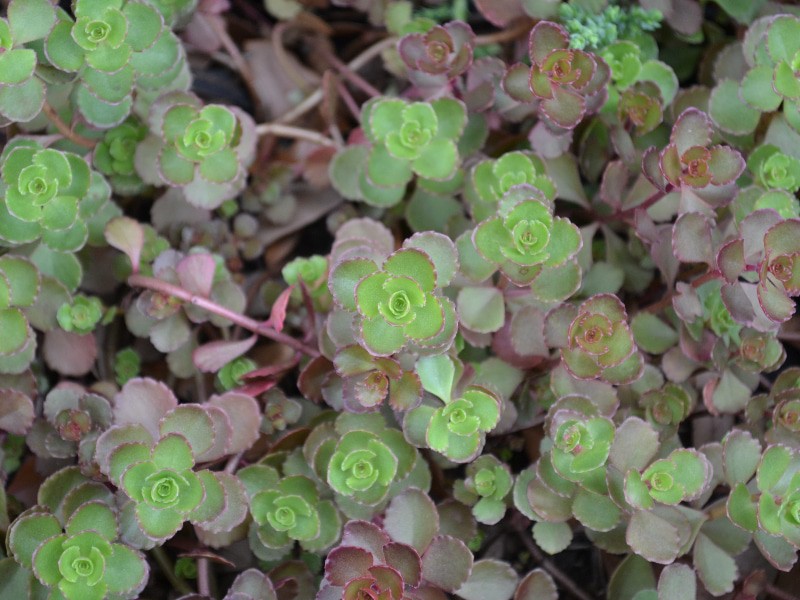
You’ll be pleased that it only takes two steps to learn how to plant sedum tiles. With the many brands in the market, such as Drop and Grow, you’ll notice that the general way of planting these tiles is straightforward. The result is even more rewarding in comparison to the effort you have to exert.
Some gardeners who are growing in the greenhouse usually add sedum tiles indoors to create a livelier-look. Having multiple sedum cuttings add color and texture in a quick DIY-friendly way, so why not give them a try and add some to your space? In two easy steps, you’ll have a unique-looking garden, greenhouse, or backyard without any stress on planting and maintaining.

How To Plant Sedum Tiles For Success
You might need to do some preparation practices once you got your sedum tiles. Manufacturers ship them in their dormant state, so you need to place them outdoors to receive the sun. Before planting, you can moisten the plant.
Step #1. Lay
Perhaps the most significant advantage of sedum tiles is that you plant them without any digging necessary. The only requirement is to have a hole that can accommodate the root ball so that it’s at the same level as the ground surface and the roots contact the soil. Once you have the holes, prepare the soil by loosening it, then lay the tiles accordingly.
You can even create a more personalized look by cutting the tiles into shapes and sizes and lay them in a pattern on your space. It’s also worthing noting to allocate a distance of at least 6 inches among the individual tiles. Remember that spacing will always be crucial for plants, regardless of how you plant and use them.
Where to use sedum tiles?
There are many ways to use sedum tiles because their size is not obstructive, like other higher plants. You can cut them to create borders or enhance the walkway’s look by putting them at the sides or between flagstones. You can create conversation pieces and use them as decor in walls and vertical or hanging gardens.
If you hate mowing, you can replace your lawn with sedum tiles and still maintain a lively looking backyard. Some gardeners even put them on roofs, so sedum tiles are not just for the ground. Lastly, sedum tiles can absorb moisture from the moisture or runoff on your paver, thus losing the need to rely on sewage systems.
Step #2. Secure into place and water
The next step after laying the tiles on the ground is to secure them in place. As you would with other plants, you do this by packing them firmly with soil. You can then water the plants as recommended by Cottage Farms after planting to improve the soil and roots’ contact.
How to maintain sedum tiles?
The beauty of sedum tiles is that they are hardy, so you can leave them alone after planting and they’ll still thrive without maintenance. But of course, it’s still always better to check the varieties you’re getting to know more about their ideal conditions. For example, you can water them every other day during the first two weeks and occasionally in their first summer.
Remember that both overwatering and underwatering damage these drought-tolerant plants, so other than checking the drainage, only water when the condition is extremely arid. Do you fertilize sedum tiles? During the growing season, water-soluble fertilizer is a good idea, but stop fertilizing after September 1 as preparation for dormancy.
You can then fertilize in spring when the plants have new growth. Besides watering and feeding, you might get curious if sedum tiles require pruning. The truth is some gardeners get by without these practices, but if the growth is starting to look unsightly, you can always trim them.
How to winter sedum tiles?
The greenhouse is a safe bet for growing sedum tiles if you don’t want to relocate in winter. Nonetheless, most sedum plants are winter hardy, especially when they’re in the ground. Those with harsh winters can always bring those in containers indoors before the temperature gets below freezing.
You can also help the plants prepare for the cold ground by watering late in the fall and checking the soil’s moisture during winter. Once spring comes, you can move the plants outdoor again.
Conclusion
Do you want to improve the look of your landscape, but you hate digging? This article teaches you to learn how to plant sedum tiles in two simple steps. Because that’s the main advantage you’ll get with these plants; they don’t require many steps to get started.
Prepare the location by loosening the soil. You can also cut the sedum tiles in the shape you want and arrange them to your liking. The only factor that you must remember is that the tiles should have 6 inches of space among them, and the holes can accommodate the root ball to have it level with the ground surface.
And that’s it! You don’t really do any maintenance with sedum tiles, but you can always occasionally water, feed, and trim if necessary. Overall, these plants are generally self-sufficient, and they’ll thrive without much help.
