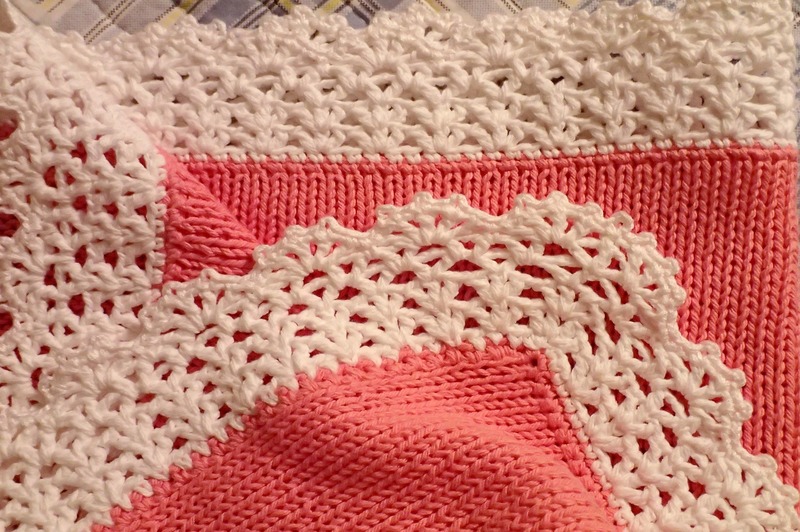
If you’ve finished creating a blanket, the next thing to learn is how to add a border to a knitted blanket. A lot of first-timers often neglect this part when it only takes four steps. Once you’ve tried and mastered these easy steps, you’ll see your borders as one of the significant parts of the blanket.

There have been so many styles, designs, and techniques for knitting the blanket itself. There is also a wide variety of materials to work on for them. Along with these, border designs and tutorials are also rising in popularity.
The new decade has been reinforcing the frontier of multimedia content. If you are not a fan of watching people demonstrate to learn something, we’ll provide you with listed steps that are just as easy to follow as other tutorials.
Steps On How To Add A Border To A Knitted Blanket
There are multiple ways to choose from in making knitted blanket borders. On these steps, we are going to focus on adding single crochet borders on a knitted blanket. You can also try doing multiple layers for border or knitted borders which are a few higher concerning complexity.
Step #1. Prep all your materials and working area
For a single layer of crochet, you’ll need less yarn than what you used for the blanket. You can mix it up by combining different yarn types, but this may not be advisable for first-timers.
Different yarns require other cleaning and maintenance techniques, so if you’re a beginner, it’s better to use the same materials for the blanket and the border.
You can pick a different color, but most experienced knitters recommend the exact size of yarns for the border and the blanket. Using a suitable crochet needle can compensate for a subtle difference in knot tensions between a crochet and a knit.
Sit beside your finished knitted blanket and make sure that you have a scissor nearby.
Step #2. Pick a corner and set-up your crochet
Some experts would say that you must always start from the right, but this could be harsh for left-handed beginners. Other than that, you can consider starting at a corner where you’re most comfortable. Just pay attention to where the respective smooth sides are since there are knitted blankets that aren’t reversible.
Starting at the corner will neatly cover your first stitch; insert the needle from top to bottom on the corner bind of your blanket, make sure you include the two strings of the bind. Once your needle is through, wrap your border yarn on the hook, then pull the needle back out from the same stitch; This should create a loop of your border yarn on the top side of the first knitted stitch.
Make sure that you leave both ends of the yarn on the bottom side. With your needle at the top, wrap the longer end of the border yarn around the needle hook from the bottom, top, then bottom again. Pull the created yarn loop around the needle hook through the first loop at the top of the knitted blanket.
Step #3: Create a single crochet
After setting up or anchoring your border, you can proceed to the crochet. Next, you need to insert the needle through the next loop of your blanket, whether you prefer right-to-left or left-to-right. Wrap the border yarn around the hook and pull it out through the same spot you inserted.
You’ll notice that there are now two loops stuck in your needle. What you’re going to do next is wrap the border yarn around the needle: bottom-top-bottom. Gently pull this new loop through the first two stuck in your needle, and that’s the first crochet stitch.
Make sure that the latest loop remains stuck in the needle.
Step #4: Make as much crochet to finish covering the blanket edge.
Keep making single crochets until you finish the entire border of the blanket.
- Insert the needle through the next loop of the blanket
- Wrap the border yarn around the hook and pull it out on the same knitted stitch
- Two loops stuck in your needle, wrap the border yarn around the needle and pull it through the two stocks. One loop would always be in your needle.
To round up corners, add two to three single crochets on the same knit hole before continuing to the next edge. After you’ve reached the initial corner, you can lock it, making a slip stitch on the spot where you first set up.
How does a border help your knitted blanket?
Though borders on knitted blankets mainly serve as additional aesthetic entry, they can serve other purposes that can be both obvious or not. Here are some of how it becomes beneficial and worth doing.
- It helps in tidying and keeping your knitted edges neat with the length or width of your preference.
- It supports any loose or not-so-pretty knits tucked underneath.
- It protects your knitted blanket from getting damaged by sudden and unexpected pulls.
As many advantages of adding a border can give your blanket, you must also note that it also risks damaging your blanket when you pull improperly on the knits.
Conclusion
There’s a lot to read on how to add a border to a knitted blanket, and each technique can be categorized by the complexity and time you’ll probably need to finish a single project. These learnings and the satisfaction of using something you made yourself are why knitting keeps on with all generations.
