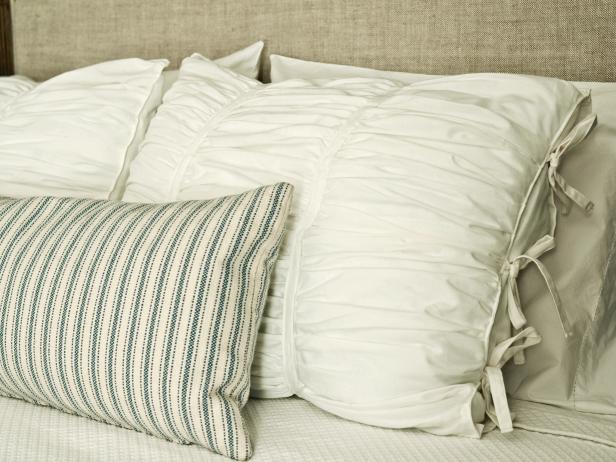
Decorative pillows are in, and knowing how to make a king-size pillow sham is a bonus. These pillow designs are surely made to impress.
A pillow sham functions like a standard pillowcase. What makes it popular is that aside from the protection it gives to your pillows, it also adds an aesthetic value to your overall bed or room decoration.

You could place them behind your regular pillows when sleeping. Or you could get yourself a set of shams to pair with your duvet coverlet. When sitting in bed, they could also be used as support. Shams are the ideal choice for precisely these reasons.
What are the Benefits of Using a Pillow Sham?
You’ll be glad to know that awesome benefits come with the use of a pillow sham. Let’s explore them:
It keeps your bedding fresh and clean
The last thing you’d want is to wash your entire bedding set on a daily basis. However, when you sweat, rub lotions, or shed some dust into your sheets while you’re sleeping at night, you will get them dirty.
In most cases, these can cause unsightly stains on your bedding. If you use a pillow sham, you can cover these unsightly marks until you decide to wash your bedding.
It creates a new look and feel to your bedroom
One of the best things about using pillow shams is the fact that they can give your bedroom the kind of look and feel that you’ve always wanted – without the cost to remodel. They’re the easiest way to spice up your bedroom décor to make it look cozier and more relaxing. This eliminates the need to hire a decorator!
Your Guide on How to Make a King-size Pillow Sham
Shams was created to add style to your bed arrangements. These decorative cases come in 3 sizes, depending on the pillow you are using: Standard Sham (26” x 20”), Euro Sham (26” x 26”), and King Sham (36” x 20”).
If you are in the habit of doing the home decorating by yourself, you could start with making a pillow sham. It’s not that hard to do, for starters. Remember, there are various ways you could style your bed pillows with the use of shams.
It might also be a good idea to make a blueprint of what needs to be done so that the entire DIY process goes smoothly. Check out these quick tips on how to create your own King-size sham.
Step 1: Double-check your pillow’s exact measurements
Start by double-checking the exact measurements of your pillow. Avoid using a flexible tape measure (a firm one is more accurate). Stretch the pillow on a flat surface, then measure it from one side to the other, not diagonally or from top to bottom.
Step 2: Cut the fabric based on your desired fit
Have the fabric ready and cut into the desired fit. Keep in mind the measurements of your pillow. Add 3 to 4 inches for a flange, plus an extra inch as a seam allowance. The front piece typically measures 41” x 25”, while the two back pieces are 25” x 25”.
Step 3: Serge or overcast the fabric’s edges
Once the fabric pieces are prepared, start serging or overcasting the edges of your cloth. Or you could try hemming one side of your two back pieces. The hem should be about ¼ inch from the side.
Step 4: Layer the front piece and put the back pieces together
The next step involves layering the front piece, making sure the right side is up. Put the two back pieces together, with a little overlapping on the finished edges. These pieces should be placed with the right side facing down.
Step 5: Sew the whole perimeter
Once the front piece and two back pieces are pinned together, sew around the whole perimeter. You have to make sure that the pieces are all aligned. Start from the center and double stitch as this is considered a stress point when the pillow is inserted.
Step 6: Measure and mark the seams
From each seam, measure approximately 2.25 inches and mark it around the whole perimeter. This is where you do the sewing. Of course, you have to check beforehand if the pillow can fit inside the closure before finishing the sewing.
Step 7: Trim the excess fabric and press each seam
For each corner, you could trim the excess fabric or clip the tips off a bit (just leave about 1/8 inch of fabric), then turn it facing the right side out. Don’t forget to press each of the seams for a nicer and more pointed look.
Step 8: Insert the pillow into the sham
Poke each of the four corners out by reaching inside the back opening and pushing against them. Turn the pillow sham on its back and insert half of your pillow through the top flap. Push it down, then pull the other flap out to insert the other half of your pillow.
Step 9: Starch your sham if you want stiffer borders
If you prefer to have a stiffer border on the outside, you could try starching your shams before inserting your pillow in the sham. Or you could iron all of your sham’s edges flat. Either way, it makes the sham look better.
The Bottom Line
Aesthetic-looking pillows are the trend these days, and it’s a good idea to know how to make a king-size pillow sham for a better bedding arrangement. Incorporating these into your design is definitely a good investment for the overall look of your bed.
