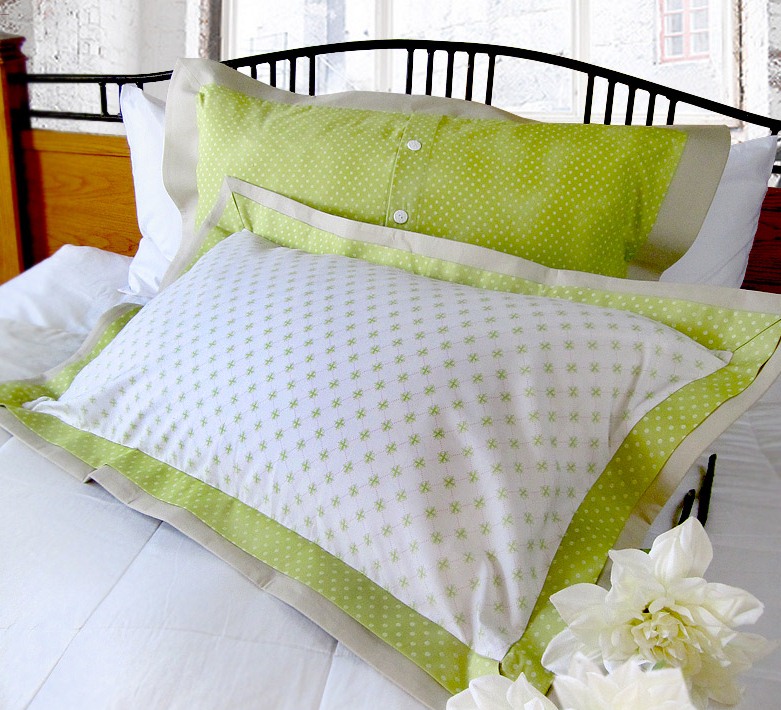
This tutorial will help you learn how to make a king-size pillow sham with flange. For each room in your house, it is a staple decoration to spice up the place.

What is a Pillow Sham with Flange?
Flange pertains to the embellished strip of fabric that’s often placed on the edge or edges of a pillow sham or pillowcases, and sometimes on duvet covers and flat sheets. A flanged edge is a classic accent in pillows and it’s typically added on all four sides of pillows.
The one to three inches of allowance on all sides creates an illusion of a larger pillow while offering an elegant and timeless design. Sometimes, pillow manufacturers use several pieces of fabric to create a beautiful flange.
A flanged pillow is more decorative compared to your standard pillows, and they’re relatively easier to sew! To sew a king-sized pillow sham with flange, you’ll only need basic sewing skills and the entire process shouldn’t take more than a day to finish. The flanged pillow shams you create will be a beautiful contrast when arranged together with your other pillows.
A Guide on How to Make A King-size Pillow Sham with Flange
The flange applies to the additional material on the ends of the pillow sham. It makes the pillow appear wider either with its similar or contrasting fabric used. You may utilize cotton, sheets, or decorative textiles.
For each bedding set you own, you need a pair of excellent pillow shams. Those crisp, custom-tailored pillow shams with flanges are traditional and incredibly easy to sew.
Most people prefer their pillow fills to be inserted and taken out quickly for cleaning with envelope-style gaps in the back. This article will also guide you in sewing an envelope opening for your pillow sham with flange.
Step 1: Wash the fabric to be used
Most king-size pillow shams with flange are usually 28 inches in length and 40 inches in width. You will also need a matching thread, sewing machine, needle, flat iron, and other sewing essentials.
Often pre-wash the material if you intend to wash sham pillow covers in particular. Many decorative fabrics are just dry cleaned, but deep washing will benefit you in maintaining cotton fabrics.
Step 2: Cut the fabric
Besides the standard measurement, you can also have a king-size pillow that is 20×36 inches. This pillow can have a flange measured with a minimum of half an inch up to three inches.
It is also recommended to have a pillow cover one or two inches smaller than the pillow itself to make the pillow appear fuller. For the seam allowance, you would want to apply an additional inch or two.
Cut a piece of the fabric’s flanges an inch shorter. This step is optional, but it does not cause the corners to look floppy. For more oversized flanges, this is mainly an appropriate step.
Step 3: Create the envelope
The back portion has two overlapping sections to create an opening for the envelope where the pillow is inserted. You can use a similar or contrasting fabric for the envelope. Cut a piece from the back part, which is eight inches long.
Following the same dimensions, this should be 35×23″. Then draw and cut a line at the center to have two bits of the same size. Iron the pieces to attach the back of the pillow cover to the front part.
Step 4: Stitch the pieces
Fold over the end half an inch and iron on each of the rear portions. Fold again another half an inch and iron it carefully. Check if you are folding and ironing at the ends that overlap.
Sew near the edges’ inner fold. Then, set up the back parts with the front face up. Pin the fabric in place. Sew the whole piece with a half-inch edge at first and, at last, backstitch.
Turn the pillow sham cover the wrong side in and smoothen the corners. Press the sides using a flat iron. Ironing the pieces ensures that you are working the pillow’s corners to an excellent point.
To create the flange, you must pin along the sham’s outer boundaries so that the fabric does not move when it is being sewn. Use the ruler on the sewing table of your sewing machine to move your pillow sham around.
Then, sew the sides of the pillow cover with a hem allowance of 3 inches. If you like, you can opt to use a piece of tape to mark the dimensions and stitch along them with the seamed sides of your pillow sham.
You can start sewing in the middle of the pillow’s bottom side to avoid backstitching as soon as the shams are placed. Insert your pillow through the envelope, and your pillow sham with flange is done.
Final Thoughts on How to Make a King-size Pillow Sham with Flange
This simple step-by-step tutorial on how to make a king-size pillow sham with flange will help you save money since it costs about half the price of that from stores. The extra fabric you have after making the project can also be used for future endeavors.
