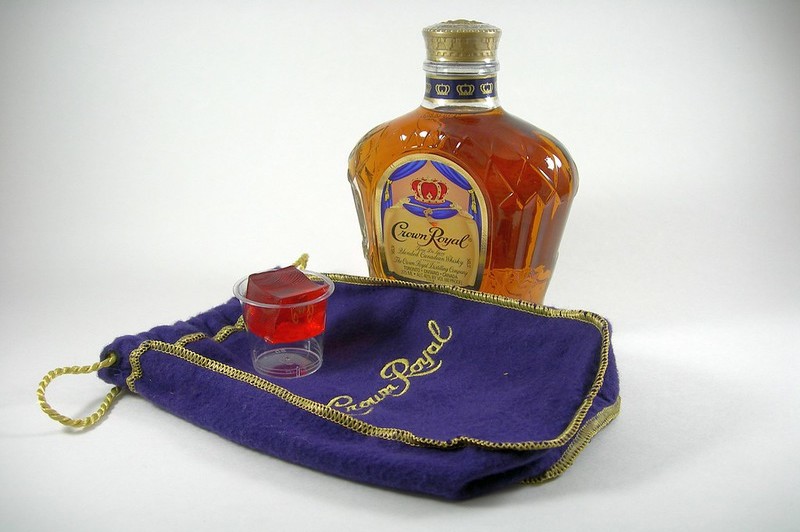
Do you have a collection of Crown Royal bags and start to wonder how to make a crown royal blanket out of them?

Look no further, because we will discuss how to make a blanket using Crown Royal bags through quilting!
What Is A Crown Royal Blanket?
Crown Royal blankets are made from Crown Royal bags, which is the cloth bag that comes with their whiskey.
These drawstring bags have the Crown Royal logo on them, so you can’t miss the name.
Most of the Crown Royal bags are purple, but they also come in black, blue, and red, to name a few.
They are quite commonly used to make quilts.
You can choose to have other people make you Crown royal blankets from your collection of Crown Royal bags.
However, you can also do it yourself. It would be a good exercise for your mind to try something new!
Basic Guide On How To Make A Crown Royal Blanket
Step #1. Prepare the materials
The first thing you need to do is prepare the materials.
You would need scissors, iron, cutting mat, ruler, pins, fabric pencil, sewing machine, backing fabric, and the Crown Royal bags.
First, you have to remove the drawstring from the bags. Then, wash, dry, and cut the bags up.
After cutting them, press them from the wrong side. Remember to press and not iron.
Step #2. Cut the crown royal bags
The next step you need to do is to cut the plain Crown Royal side of the bags into squares measuring 4 ¼ each.
Then, cut the ones with the logos into squares measuring 3 ¾.
Step #3 Prepare and cut another fabric
Then, prepare the light fabric.
This is used to define your quilt pattern, a nice juxtaposition from the purple of Crown Royal bags.
Cut about 80 squares measuring 4 ¼.
Step #4. Pattern
For this step, you are going to arrange the squares to form your pleating design. Make sure to save space for seams.
Then, capture your design with your camera. Print the photo and use it as a reference.
Step #5. Draw a diagonal line
You have to use a fabric pencil to draw a diagonal line from corner to corner of the squares for this step.
Use a ruler to get a straight line.
After that, pin together the Crown Royal fabrics (with logo and plain) and the lighter fabrics according to the planned pattern.
Step #6. Start stitching
You have to chain stitch a scant ¼ from the lines you have drawn for this step.
Cut down at the center after stitching a scant.
Then, press towards the Crown Royal fabric and measure each square to 3 ¾.
Refer to the pattern first before stitching the pieces together.
If you’re not familiar with the term, “scant” is a sewing term used to define the seam allowance.
For some, it’s a thread’s width, and it’s two thread’s width. However, accurately, it’s a quarter inch seam allowance.
Step #7. In rows of three
The first square should be sewn (with a machine) in the top left-hand corner.
Remember to keep ¼-inch seams and sew each row into a long strip.
We advise you to work in rows of three to allow you to monitor your progress.
Then, trim the squares into 10 ¼. Remember to press the seams and press the blanket.
Step #8. Borders
You can use any fabric for the border you want. It can be the spare squares so they can be of use.
Make sure to make them fit. A friendly tip from us is to use the bobby pins to hold them in place during stitching.
However, when you are pressing the fabric before stitching, do not press with the bobby pins in place.
This may result in the pins melting or the fabric having an irregular shape.
Step #9. Backing fabric
You can use any type of fabric as backing fabric. Make sure it’s the same size as your quilt.
You can use flannel fabric as your backing fabric as it is a great juxtaposition to the purple fabric.
Lay the backing fabric on a flat surface, with the wrong side facing up.
Then, lay the quilt you have seen, with the wrong side meeting the backing fabric’s wrong side.
Make sure that the edges of both fabrics are aligned. Pin them together to keep it so.
Step #10. Sewing the backing fabric
Sew the quilt and backing fabric together by making random patterns that outline the Crown Royal logo squares.
We advise you to use purple thread, so it matches the quilt.
Also, add blanket binding around the blanket. Use a contrasting or matching color; it’s up to you!
Then, sew the binding around the quilt on one side first. Then, on the other side, press it, then sew it.
Conclusion
Now that you know how to make a Crown Royal blanket through quilting, you can make use of your collection of Crown Royal bags so they wouldn’t waste away.
It is also a good example of recycling, so do it often and do it well!
