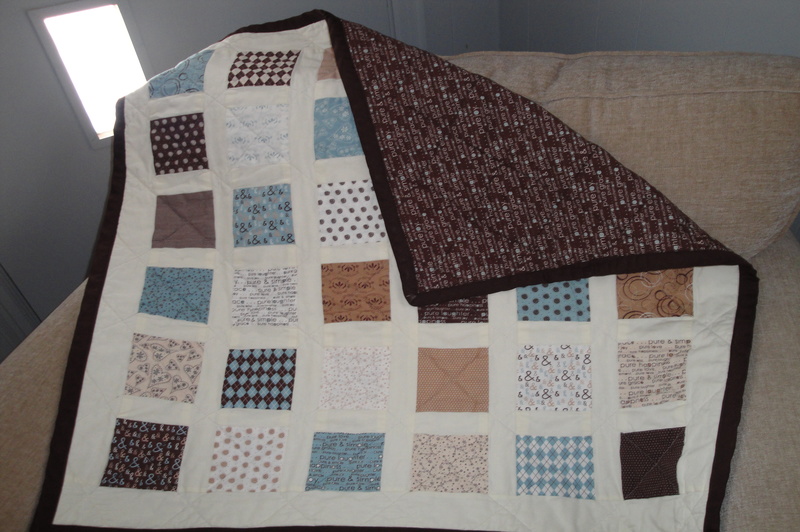
Learning how to quilt a baby blanket is a great way to pass the time. Creating one from scratch involves cutting up fabrics into little pieces and sewing them onto a thick batting.

Not only does quilting teach you a new skill, but it also gives you the chance to create a gift straight from the heart.
Quilted baby blankets are the perfect present for your (or your friend’s) newborn or toddler.
Do you want to know how to make a warm, comfortable blanket for your little angel? Continue reading, and you will learn the easiest way to create one all by yourself.
Step-By-Step Guide On How To Quilt A Baby Blanket
Quilting a baby blanket is fun, easy, and simple but very time-intensive. The process, however, can be made quicker by using the right tools.
Step 1. Prepare the materials
To make a baby blanket quilt, you will need:
- Rotary cutters (or a pair of sharp scissors)
- Cutting mat
- Ruler
- Different straight and safety pins
- Threads
- Multiple fabrics of different colors (for the front and the back)
- Quilt batting
- Iron
Quilt battings are the thick material in quilts that add extra warmth to them. There are multiple quilt batting options available, but cotton would be best for beginners.
To create a quilt, you will need to sew. You can either use a sewing machine or choose to sew by hand.
The latter option, however, is more time-consuming, but both will get the job done.
There are many quilt patterns to choose from, ranging from very simple to extremely complex. For this tutorial, let’s use the simplest one: the patchwork quilt.
This pattern involves cutting up cloth into symmetrical squares and sewing them all together.
Step 2. Prepare the fabrics
Wash the fabrics first before cutting them. Washing the fabrics first will let them shrink up to size and remove any excess dyes and stuck dirt.
Afterwards, iron out the wrinkles of the cloth to stretch them out and make them look neat.
Baby blankets are often found in the size of 30 inches x 30 inches.
Of course, you can choose to make one of a different size, but remember to add a ¼ inch allowance on each side of the squares to make them easier to sew together.
For example, to create a 30 x 30 blanket with 5-inch squares, you will need thirty-six 5 ½ “x 5 ½” squares.
Cut the fabric into squares of equal sizes and lay them out into rows and columns. In this part of the process, you are designing your very own blanket!
Step 3. Quilting
Here comes the most effortful but most rewarding step. You have to sew your squares, batting, and fabric together.
Start sewing the squares together, row by row. Put two squares on top of each other and stitch the ¼ inch allowance.
Lay them out flat and repeat the process for the next square. You should only see all the stitches from the backside of the patchwork.
Afterwards, you will end up with long, thin strips of fabric. Iron out the creases of the fabric and begin sewing them together.
To do this, put them on top of each other and sew the ¼ inch allowances together.
Now that you have the front of your quilt, what’s left is to attach it to the batting and the back fabric. Cut the batting and the backing 2 inches bigger than the front.
Lay out your fabrics in order of their appearance: The backing underneath, the batting in the middle, and the quilt pattern on top.
Line up the sides and smooth out the wrinkles, working from the center to the quilt’s edges.
Pin the fabrics together from the center outwards (or use basting spray) to hold them all together. Sew the layers together, starting from the center and moving outwards.
You can follow the seams you have created between the patchwork pieces or choose to sew it freehand.
All that is left is to add the bindings – the corners of the quilt that will hold them in place.
Cut a piece of the fabric long enough to cover a side of your quilt, with a width of around 2.5 – 3 inches.
Iron out the bindings lengthwise to create a seam, and pin them in place. Using a ½ inch seam, attach the binding to the blanket by sewing them together.
Repeat this for all sides.
Fold any excess bindings and sew them onto the blanket. Remove all the pins and safely keep all the materials away.
Step 4. Enjoy
Congratulations! Your hard work has finally paid off. You have created your very own quilted baby blanket that your little recipient will surely love!
Conclusion
Learning how to quilt a baby blanket is an easy task. The subsequent steps of repeated cutting and sewing are a bit more difficult but are surely worth the effort.
You can use the quilt to warm up your baby or to give it as a present for someone else’s newborn. With this knowledge, you can even start your own quilting business!
