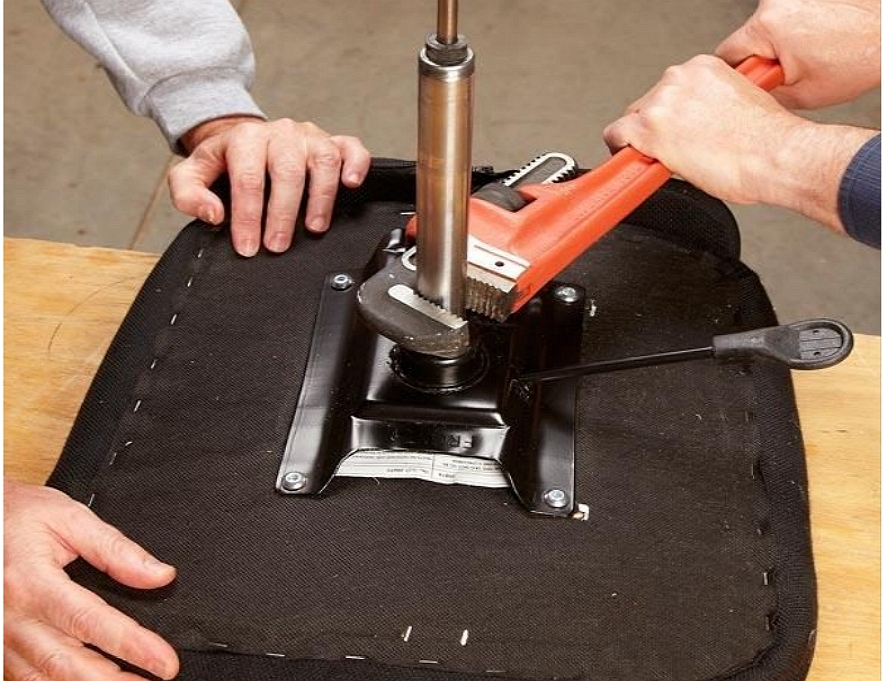
A domicil swivel chair is a great addition to any home. The problem with these chairs, however, is that they can be quite expensive and relatively difficult to get repaired if something goes wrong.
If you have an old swivel chair in your house or office and it’s not working how it should anymore, don’t worry! There are many ways to fix the problem without spending too much money on repairs.

In this blog post, we will discuss fixing an old swivel chair for a fraction of what it would cost at the store.
Steps on Fixing Domicil Swivel Chair
What you will need:
Phillips head screwdriver. A large piece of scrap wood or cardboard to place under the chair as it is being worked on for protection from scratches and marks.
Scissors, wire cutters (electrical tape may also be needed) and a glue gun if desired.
Instead of paying for someone else to fix the problem, give these steps a try.
Step One: Place your old swivel chair on top of your scrap piece of wood or cardboard and turn it sideways so you can access the screws in the back. Take off all of the fabric (if necessary) by unscrewing any visible screws at the base of the chair and then pry off any fabric with a flat head screwdriver.
Step Two: Remove the seat by unscrewing any visible screws on it.
Step Three: Turn the chair back to how it would normally be sat in and remove all of the screws from underneath with a flat head screwdriver, then pull off the metal plate that holds up the reclining mechanism. Remove this piece completely so you can get at everything else.
Step Four: Get your scrap piece of wood and push the metal plate as far to one side you can get it. If there’s a lot of rust, use some steel wool to clean off any loose pieces before continuing. Take the crossbar out (remove all of the screws) that was holding up the reclining mechanism so you’ll be able to get at the bottom of the swivel chair.
Step Five: Look for any screws on the underside that may have been hidden by how you were sitting in it when removing them and remove those as well. Now, gently pull up on each side of a metal piece with your hands until it pops out from its place and is detached from the swivel chair.
Step Six: If you’re still having trouble, take your flat-head screwdriver and pry up on one side of a metal piece until it pops out from its place and is detached then repeat this for the other side. Keep in mind that if at any point there’s too much stress being put on the chair, you should stop and call a professional.
Step Seven: Now that each metal piece is detached from its place, take your screwdriver and remove all of the screws to detach it completely. If there are any spare pieces left over after this process, put them into a container for safekeeping so they don’t get lost.
Step Eight: Now that the metal pieces have been removed, you can now take off the fabric. To do this, start by removing one of the armrests and then slowly fold it down onto itself until there is no longer a crease in between each side.
Then remove another armrest from its place on the opposite side and repeat the same process. Next, start removing the fabric from one side and then fold it over onto itself to get all of the wrinkles out that have been caused by how tightly it was stitched together.
Step Nine: Once you’re finished with this step, take a look at how much is left-over fabric on both sides until you find your starting point.
Step Ten: Clamp the fabric to the chair and start stapling it onto itself all around until you reach the end of how much is left over on either side. Once this has been completed, reattach one of the armrests that were removed in Step One with a new piece of string or wire.
Step Eleven: Put the chair back onto its base to test how stable it feels before moving on to Step Twelve, which is putting a new coat of paint or varnish over the whole thing and letting it dry overnight.
Step Twelve: Once this has been completed, reattach one of the armrests that were removed in Step One with a new piece of string or wire.
Step Thirteen: Put the chair back onto its base to test how stable it feels before moving on to Step Fourteen, which is putting a new coat of paint or varnish over the whole thing and letting it dry overnight.
How to Clean Swivel Chair
Step One: Remove the swivel chair arms.
Step Two: Brush off any visible dirt with a dry brush or rag.
Step Three: Add warm water and mild detergent to your bucket, then fill it up halfway before adding in hot water. Fill the pot of boiled water with enough that can cover an entire armrest.
Step Four: Fill the deep bucket with hot water and place the arms into it. Leave them in so they can soak for a little bit before removing one arm at a time from the water once approximately 15 minutes has passed.
