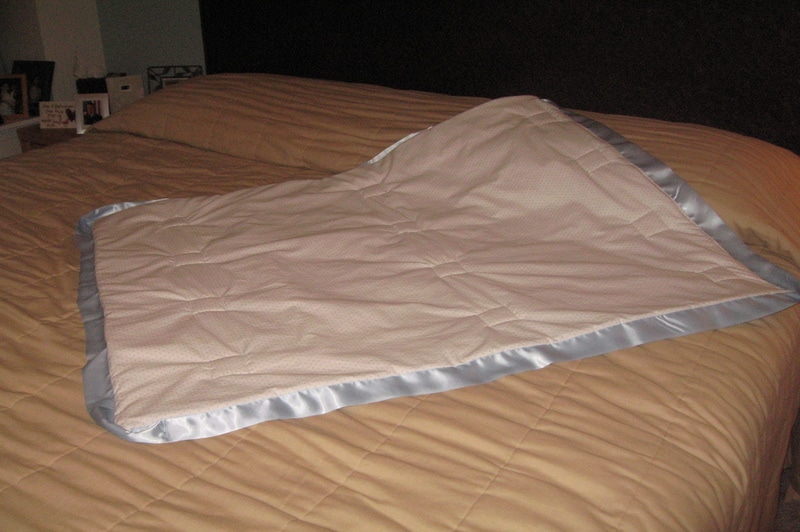
If you’re on this page, you’re probably wondering how to sew a baby blanket with satin binding.

It’s not as complicated as it sounds. You can do it yourself as long as you have the suitable materials needed for blanket binding.
What Is Blanket Binding?
Blanket binding is a type of fabric trim often used as borders in most quilts and blankets. It gives a more excellent finish to the edges and will also prevent them from fraying.
Blanket bindings are generally 2 inches wide. It comes in various patterns and colors, so it’s easy to find the design you prefer the most.
You can buy a package of binding that comes with a 4.75 yard of fabric.
What Is Satin?
Satin is a popular kind of fabric due to its smooth and glossy texture. It is originally from silk, which is a continuous thread pulled from silkworm cocoons.
Nowadays, it can be made from synthetic materials such as rayon and polyester.
Satin is durable and is most likely stronger than other standard fabrics from plain weaving. The thicker a satin fabric is, the lesser it is prone to wrinkling.
The only disadvantage of this material is that it tends to snag, making it unappealing. It’s also slippery on the hands, so as far as it’s delicate to the skin, it can be a problem in sewing.
How To Sew A Baby Blanket With Satin Binding
- Step #1. Prepare the materials. You will need a blanket, satin binding, scissors, quilter’s ruler, sewing machine, hand sewing needles, binder clips, and pins.
- Step #2. Pre-wash the baby flannel before cutting it in half because it tends to shrink. After washing and cutting the blanket in two, add your desired designs and patterns such as applique and embroidery.
- Step #3. Put together the two flannel pieces and make sure that the front is facing outward on both sides. Pin the blankets together and stitch the edges to keep them from separating.
- Step #4. Examine your satin binding and make sure to remove the frays from the edges. Open the binding that comes in a 2-inch single fold and slid the blanket inside.
- Step #5. Fold the binding to cover the edges of the blanket. Leave an inch of the binding on the corners. Pin it in place.
- Step #6. Set your machine on “zigzag stitch” and make sure not to start right at the first corner, but at least 6 inches away from it.
Overlap the stitch on the satin and the flannel. Finish the stitch up to the next corner and cut the thread.
- Step #7. Open the satin binding and fold it at a 90° angle, so the binding covers the next side. Place the flannel inside the fold of the binding.
- Step #8. Pin the binding in place. Sew the edges in a zigzag pattern once again. The corners are supposed to have a mitered edge look.
- Step #9. Once you’ve reached the first binding end, prepare to connect the next one. Measure the blanket with a ruler and cut the edge of the binding for at least 1/4 inch beyond the flannel’s edge.
- Step #10. Pin the edge of the first binding to the edge of the second one. Stitch both ends in 1/4-wide zigzag stitch. Make sure that it’s secured so it won’t fray up when washed.
- Step #11. Again, fold the corners at a 90°angle while slipping the flannel inside of the fold. You will be prompted again with a mitered edge.
Continue the process of overlapping the zigzag stitch in the binding and the flannel.
- Step #12. Make sure that all corners have a mitered look. After finishing the process, secure the thread. Cut the end of the thread and other unnecessary frays.
Tips When Sewing With Satin
Working with satin isn’t always an easy project. Here are some guides to help you have a better relationship with this popular fabric:
-
Never cut multiple layers
Due to its smooth texture, satin can be slippery, especially when placed upon each other.
Other fabrics are easy to cut, even in layers, but satin is a different case. It can slide when you lose control over it, and it’d leave you with an ugly cut.
-
Use the correct needle size
Another common characteristic of satin is it is unforgiving of needle marks. Larger needles and threads can contribute to its snagging.
More delicate fibers and needles are preferable when working with this kind of fabric.
-
Be gentle
Satin fabrics don’t perform well under pressure. Too much tension can cause its seams to wrinkle and create unwanted pulls.
Always be gentle when using satin fabric and be delicate as much as possible.
-
Refrain from applying heat
Unlike other fabrics, satin doesn’t wrinkle as much. Pressing heat into the material won’t be beneficial at all. It will only reduce the natural luster of the fabric instead of making it look better.
-
Use good pins
Every sewist knows that pinning a satin is risky. It leaves noticeable marks.
If you have the means, invest in better pins, preferable thinner ones, to ensure that no more snagging will happen in the future.
Conclusion
Learning how to sew a baby blanket with satin binding isn’t hard at all. Always remember to enjoy the process and be eager to learn new skills.
We’ve prepared the necessary steps and the guides for your next project. Happy crafting!
