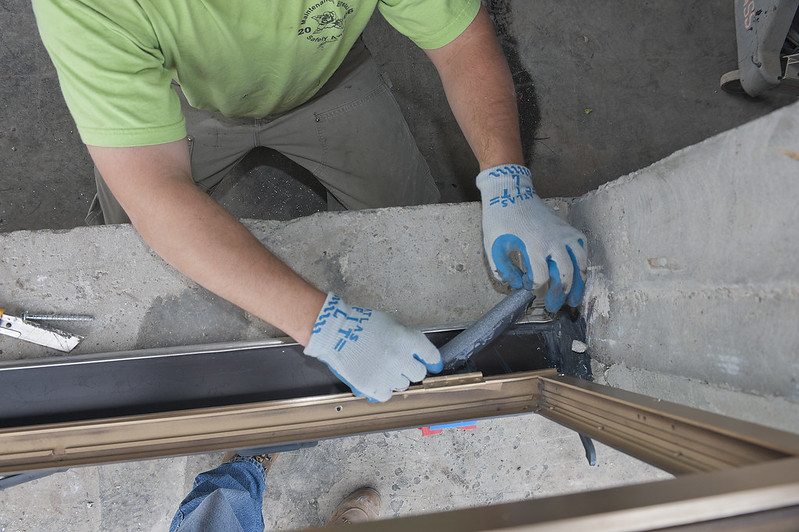
The first step on how to resurface water damaged window seal drywall is to assess the damage to determine whether you should repair or replace it. The instructions in doing the window repairs are broken down into three different how-to’s.
The first step is about resurfacing a water-damaged window. This would help you recover your damaged window frame.

After that is the resealing process, we’ll talk about removing the old seal and replacing it with a new one. Lastly, since water damage affects the structures around it, we’ll talk about fixing the drywall around the water-damaged window.
Steps In Resurfacing A Water Damaged Window
When your windows have been weathered down, the seals that protect your windows and home from water damage get affected. Sometimes, your window sills sag, and you’ll consider having the whole thing replaced.
Stop that thought and read this article first. Reading this would give you an idea of whether or not you should repair your window or have it replaced.
Step #1. Assess
Water damage on your window may seem like a minuscule issue, but it still requires assessment. Look for discoloration and warped pieces of wood.
If your window has peeling paint, that is also an indication of water damage. If you find rot on the majority of your window frame, then maybe it’s time to replace it.
Also, figure out where the water damage came from and check your insurance coverage if the root cause is included in the insurance coverage. If it is and you wish to make an insurance claim, have your lawyer help you. Document the water damage and compile your maintenance receipts as well.
Step #2. Remove
After assessing the damage and seeing that it is manageable, proceed on removing the peeling paint. Chisel the soft rotten spots out of the sill, too.
Make sure the window frame is dry before proceeding with sanding it. Use fine-grit sandpaper to sand the sill down.
Then, get rid of splinters and the paint you weren’t able to remove earlier. After that, wipe the sill down to remove the dust.
Step #3. Epoxy wood primer
Mix the epoxy filler and activator according to the appropriate mixing ratio. Then, use a putty now to apply the filler on the sill to seal the gaps.
Remove the excess filler with the same putty knife. Removing excess filler is vital to create a level surface on the window sill. Let the filler dry.
Step #4. Sand
After drying the filler, sand it down to smoothen it further. Wipe the dust with a damp rag.
Step #5. Prime
To protect your windowsill from further water damage, prime it with an oil-based primer. Then, apply two coats of exterior paint to shelter the window from the elements.
How to seal your windows
As mentioned above, window seals are affected by water damage. However, that does not mean that you should just put a new seal above your old one.
Step #1. Remove
First, you have to remove your old sealant. Wear gloves while you do this. Also, use a sharp tool to cut the worn-out sealant.
There would likely be strands of sealant, and you still have to remove those. You can use a white spirit to dissolve the strands.
Step #2. Apply
After removing the old sealant, you can apply the new one. Use a high-grade polyurethane caulk to seal the gaps in your windows.
Make sure you seal the following parts of the window:
- Section where one window meets another window
- The area where the frame and windows meet
- Where the wall meets the window frame
Steps in repairing drywall around a window
After learning about sealing your windows, here’s the last part of resurfacing a water-damaged window seal drywall.
Step #1. Remove
Look for the damaged parts of the drywall around your window and remove them. Make a hole in the damaged area.
Use a keyhole saw to make shallow cuts. Make sure you do not cut the stud. Use the saw to cut into the drywall until you have removed the damaged area.
Step #2. Ready
Ready a piece of board to attach to the studs. Use 2-inch wood screws to secure them.
Then, attach the new drywall to the boards. Use drywall screws to secure the drywall boards every four inches around the perimeter of the wall.
Step #3. Joint compound
Put a coat of joint compound around the drywall patch’s joint. Then, place a joint tape over the joints and apply another layer of joint compound.
Let it dry for 24 hours and sand it down. After letting it dry, apply another coat but make it four inches wider than the first layer.
Dry the second layer before sanding it down. Finish the project by applying another layer and doing a final sanding.
Conclusion
Resurfacing involves multiple processes. It generally removes the old and damaged parts to make way for the new ones.
Ultimately, assessing the damage is vital. Assessing damage will tell you if you can repair it by yourself or if you need help from a professional. If you can do it by yourself, then freely use this article on how to resurface water damaged window seal drywall to assist you with your repairs.
