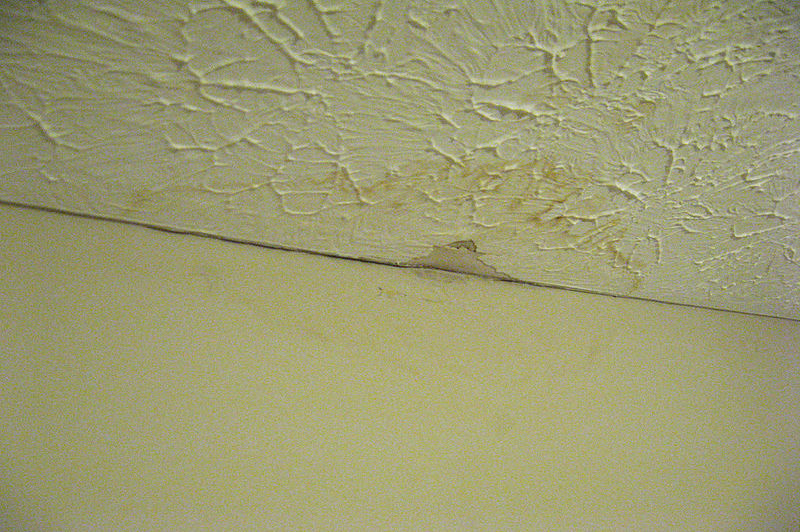
If you wish to know how to replace water damaged ceiling in slide out, this article is suitable for you. We will discuss the steps in replacing your water damaged ceiling, and we will also identify the causes of water damages and how we can stop them.
Slide outs are popular for people who have recreational vans or RVs. RVs nowadays usually have slide outs, which can expand to create a larger space inside them. You can control some slide outs through your RVs control center, and you can extend some of them manually.

Slide outs in recreational vans are sturdy, but they are also prone to water damages. If not treated or replaced immediately, it can cause further damages to your RV. To answer your problem, continue reading!
What Causes Water Damage In The Ceiling Of A Slide Out?
Many factors can lead to water damages in the ceiling of your slide out. One of its leading causes is heavy rains. When a rainstorm occurs, there will be a high possibility of a water leak inside your RV, especially when the window of the slides is open.
Water can also leak in the ceiling through broken slide seals or rubber gaskets. These slide seals should prevent the water from dripping, but they can fail due to cracks. Even the slightest damage can let the water go in.
Aside from that, water can also leak due to:
- Water condensation from the air conditioner in your RV’s rooftop
- Pooling water on your slide toppers
- Leaking plumbing lines in your RV
Knowing these factors of water damage is essential so that you can know when to fix your slide out ceiling. You need to be aware of different signs of water leaks to prevent further complications.
Replacing A Water Damaged Ceiling In Your Slide Out?
If you can already notice water damages to your ceiling, it is best to replace it immediately. However, you can stay calm because there are only six steps to do that!
Step #1. Removing the water damaged ceiling
Before anything else, please let your water damaged ceiling dry up. Letting it dry can take time, so make sure that you give ample time for it.
After doing that, disconnect any electrical wires in it. If there are lights installed, ensure to remove them first. Next, carefully remove the ceiling by pulling out the screws that attach them to the beams.
Step #2. Repairing the source of water damage
Once you have already removed the ceiling, you can now assess the water damage. You need to check if there are holes in your RV’s roof or cracks on the rubber gaskets. Ensure to find the cause of the water leak, and repair any damage immediately.
Replacing your ceiling without repairing the cause of the water leak will be of no use. The water damage can occur again, which can lead to costly restorations.
Step #3. Cleaning the beams
Water damages in your ceiling can sometimes lead to rusty or dirty beams. If there is massive corrosion to the framing, you can also consider replacing them too.
Clean any dirt and debris first before proceeding to the following process. You can use water and bleach solutions to do this.
Step #4. Organizing the wires
If you wish to rearrange the electrical wires in your ceiling, you are free to do so. You can also check if there are damaged wires. If you encounter some, repair them also.
Step #5. Replacing the plywood
Please measure the size of the ceiling to cut the correct length of plywood for it. If you already have the plywood, you can start putting it back by using wood glues or screws. Ensure to attach them correctly to prevent them from falling.
If you want to replace your rubber gaskets, you can put new ones in before attaching the plywood.
Step #6. Applying final touches
Lastly, you can start sanding the ceiling. You can also apply primer if you want to do so. After that, you are free to choose the color of the paint you want to use for painting the ceiling of your slide out.
How Can You Stop Water Damages In The Ceiling Of Your Slide Out?
Preventing water damages can help a lot in maintaining the quality of your slide out ceiling. To stop water leaks, you should:
- Monitor and replace rubber gaskets every two years or when they have cracks
- Put a slide out topper on your RV
- Use slide out seal conditioner
- Ensure to level your RV
It is indeed costly to repair various damages on your RV. Sometimes, companies that sell RVs have insurance for this matter. However, they only have insurance coverage for water damages from accidents and improper installment of gaskets upon buying them.
Conclusion
You are good to go! You only need to follow the steps on how to replace water damaged ceiling in slide out to fix your problem. If you have damaged ceilings right now, you should go and replace them immediately.
