As a homeowner, you may feel responsible with your house in more ways than one. This is why you have to know how to repair water damaged glulam beam.
Glulam beams are relatively more robust than steel, as home builders might say. However, they do share the same characteristic as they can corrode due to water damage.

Glulam beams are strong, but they can be susceptible to decline, such as stress-bending, fire hazards, and earthquakes. They could also get wet if you did not opt for waterproof adhesive glue when it was first installed. In repairing this engineering feat, you just need to remember to inspect, repair, and reinforce the steps.
What Is A Glulam Beam?
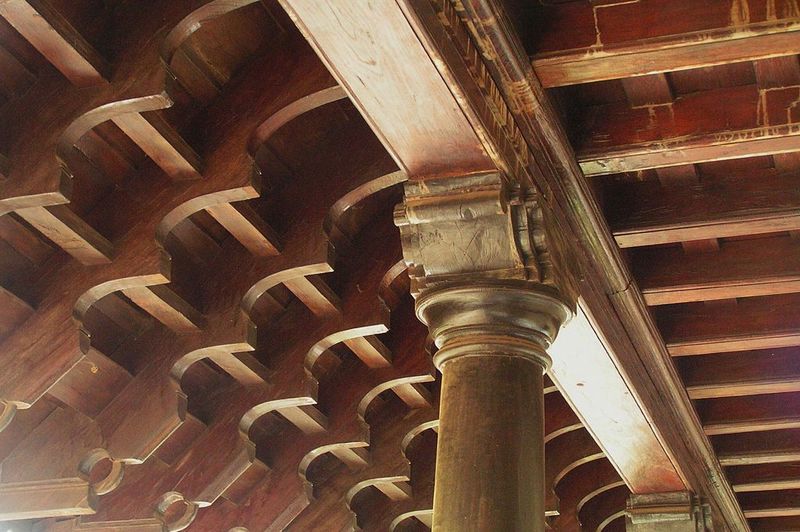
Perhaps you went to your grandmother’s house, or you went for a dip in a friendly swimming resort. Notice the streaks of long wood along with the vaulted ceilings.
Those are called glulam beams. Glulam beams are the shortened version for glued laminated timber.
Glulam beams have various uses; it is not just for the ceiling. These wood sheet laminations are structural materials strengthened with industrial adhesive. Depending on the species of lumber, they can indeed surpass steel integrity.
Glulam beams can handle stress-bending, and for that, they are explicitly classified on their flexural loading. For instance, a stamp 15F rating determines that the beam can support up to 1,500 pounds of weight.
It is up to snuff for floors, pillars, beams, ceilings, and stairs. Having glulam beams is budget-friendly, flexible, and is a pretty addition to your aesthetics.
How To Fix Water Damaged Glulam Beam
Step #1. Inspect the defacing parts
Repairing a residential apartment may be stressful, but you still need to assess those rotting glulam beams. More often than not, water can seep through those tiny chippings in between.
Yes, industrial glues such as polyurethane and melamine can really do the job. However, they can wear and tear.
Put on some protective gloves so you won’t get any splinters. After that, note that fungi may lurk around. It’s also best to wear face masks to cover your nose for possible dust mites.
If the damage is close to the support beams, mind that it can be hazardous. On the other hand, if minor water damage exists, there is no need to worry.
Step #2. Check the design and materials
Time to take the meticulous sight for some design checking. As you know, glulam beams do not just come into a single type. Simple span beams, tension beams, cantilevered beams, and compression beams are all four types.
Simple span beams support both ends of the structure, and tension beams are made to prevent something from escaping away. Cantilevered beams are longer than simple span beams to support the wall. Lastly, compression beams are also known as columns as they stand straight up to the ceiling.
Take note that you should have the proper tools because a plain hammer and a nail are just not sufficient for the repair. For a better result, use power tools.
Step #3. Replace rotten fragments
Suppose you have all the materials needed. Pull out your pry bar to reveal the insides of the glulam beam.
Often, water damage affects the surface of the timber. However, water could permeate through.
Suppose the rotten parts are thrown away, sand off the scrapes so you can lay another layer of timber. That calls for another step.
Notice how white or black spots appear on the furniture? They are called mildew.
Mildew can appear when moisture has seeped through an object. Worrying is not a problem because you won’t need to run to the store just to get rid of those pesky fungi. A little bleach, baking soda, water, and dish soap combo should manage the trick.
Step #4. Do some epoxy work
Chemicals like epoxy are dangerous when in contact with the skin. Experts at DermNet NZ say that typical epoxy resin allergic reactions could take place. Redness and swelling are two symptoms to look out for, so gear up some personal protective clothing.
Epoxies are thermoset glue that is used for industrial adhesion and home furnishing. Glued laminated timbers are clamped together by epoxy. Thin sheets are then strengthened, thanks to the natural hardening and drying element of the adhesive.
Step #5. Reinforce the new beam
Before heading to rework the beam, the beams should dry first. In this step, bring your buddy to come to help you. Once the timbers are all glued up, proceed to refinish the surface area.
A good amount of varnish makes the glulam members up the aesthetic. Make sure to put the nails on opposite sides without them dangling. Then, put a new layer of adhesive chemicals to the beam ends and attach it to the structure you wish to repair.
Should You Call a Civil Engineer For This?
You should call a civil engineer for this matter if the water damage is too far fetched to salvage. Civil engineers have studied for years and are experts in the building industry.
On the other hand, call your local house repair services if you want some refurbishing advice. They should also know the manufacturing APA wood standard, hence good beams.
Conclusion
Well, having your house saturated in moisture is not the best thing, especially when the stormy season is in. Take good care of your lovely home by closely monitoring it from time to time. Better be prepared with this guide on how to repair water damaged glulam beam!
