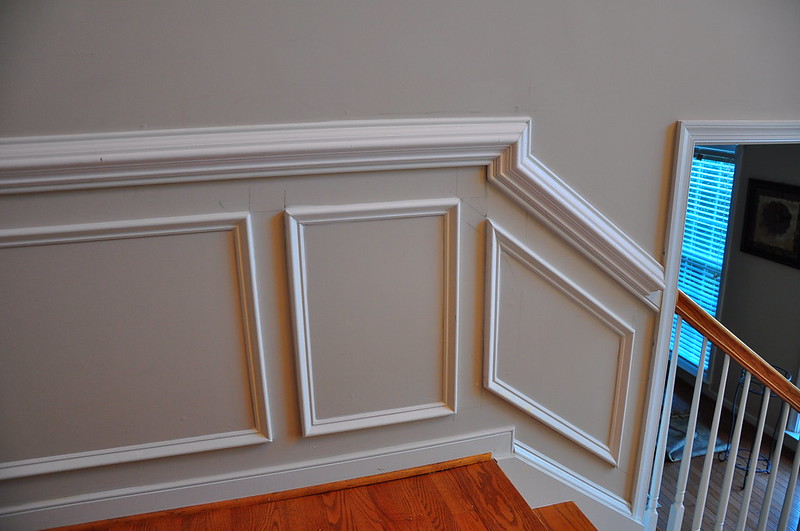
Chair rails serve as a decorative and protective barrier in busy areas, but sometimes they get worn down, so learning about how to remove chair rail is essential. You can remove them by carefully prying them off of your walls.
You can learn more about chair rails and how to remove them as you read the article. We also included how to repair walls after removing your chair rails and chair rail alternatives to add to your knowledge.

What Is A Chair Rail?
First off, a chair rail is a molding placed on an interior wall of a room. They are generally installed in places where chairs are expected to be moved a lot, like dining rooms.
It is placed approximately 36 to 38 inches from the floor, but it can be lower or higher depending on the ceiling height of the room. Use the rule of thirds to determine the placement.
First, take the wall height and divide it by three. Then, the chair rail can be placed one-third of the way on the wall.
Steps On Removing A Chair Rail
Removing chair rails may be due to personal preference or due to them being worn down. Either way, here are the steps on removing a chair rail:
Step #1. Prepare your materials
The materials you will need in removing a chair rail are:
- Utility knife
- Pry bar
- Pliers
- Rubber mallet
- Hammer
We encourage you to use a pry bar instead of a crowbar because crowbars tend to be thicker and more prominent, which will make it harder to insert them inside the chair rail.
Step #2. Cut and pry
Get your utility knife and cut along the edges of the chair rail’s trim. This step cuts the caulk and protects the walls from being torn.
After cutting along the trim, insert the pry bar’s edge into the wood trim. Then, hit it with a rubber mallet until it’s inserted correctly in the chair rail. You can use either the bottom or top of the chair rail.
Then, slowly pull the pry bar and the trim from the wall. Repeat this until you have the entire chair rail detached from the wall.
Step #3. Nails and pliers
Sometimes there are nails stuck in walls as you remove the chair rail. In this situation, you can use either the pliers or a hammer. If you have trouble removing them, you can hammer them in the wall instead.
How Do You Repair Walls After Chair Rail Removal?
The walls are bound to look damaged after a chair rail removal, so here are steps to repair them.
Step #1. Prepare the materials
The materials you need for repairing walls are the following:
- Joint compound
- Chip brush
- Primer
- Paint
- Sandpaper
- Putty knife
For the sandpaper, remember to use fine-grit sandpaper.
Step #2. Scrape and sand
Scrape the remaining caulk and bumps using your putty knife. Then, get your fine-grit sandpaper and sand the wall until they are smooth. After sanding the wall, clean it with a damp rag and wait for it to dry.
Step #3. Apply joint compound
Apply a coat of joint compound using a wide putty knife. Pay extra attention to imperfections, such as drywall paper rips and nail holes. Let it dry.
After letting it dry:
- Sand it until it’s smooth.
- Apply a second coat if the imperfections are still evident.
- Dry it, then sand it after applying a second coat.
Step #4. Prime then paint
Apply primer on the wall to prevent blotchy spots. Then, paint the wall. After painting, let it dry and clean up.
Alternatives to chair rail
After removing the chair rail and repairing your wall, you can use these as alternatives:
- Wallpaper borders
These induce a faux chair rail effect. You can do this by lowering its placement and putting it around the middle.
- Ribbon
Adhere ribbons on a thin coating of wallpaper to serve as a chair rail. You can layer them if necessary and highlight the patterns of the wallpaper. You can also place a double rail, wherein you place one ribbon eight inches above the other.
- Wallpaper cutouts
There are pre-cut designs and shapes which are known to be an effective alternative to our wood trim. To center the pattern, mark the wallpaper cutout with a pencil.
- Paint
Here, we are going for a chair rail effect by painting the top and bottom registers of the wall with different colors or shades. First, mark the divide with a strip of painter’s tape, then paint accordingly.
- Vinyl appliques
There are various kinds of vinyl appliques in craft stores, so they’re an accessible and cheap alternative to chair rails. Just peel the backing off the vinyl appliques and stick them horizontally along the wall, and you’ll have your vinyl applique chair rail!
Conclusion
It’s necessary to know how to remove chair rail, especially if you plan on redecorating a room in your home. Naturally, you’d also want to know how to repair your wall after removing the chair rails off it. Good thing we have this article to help you, and best of luck with your redecorating plans!
