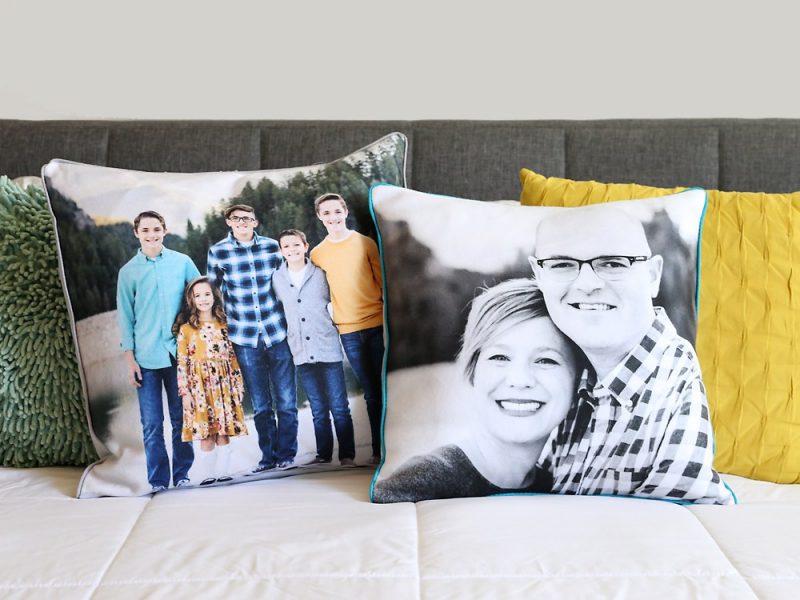
Photo pillows have never been easier through this how to put a picture on a pillowcase tutorial. It’s definitely one great gift idea.
Aside from providing your living space with its own distinct style, you also get another perk with this ingenious idea. You can very well preserve those printed photos you have hidden in your albums somewhere – and keep these recollections alive.

Why Are Pillowcases Necessary?
Before we talk about how you can put your favorite photos on your pillowcase, let’s talk about why you should use a pillowcase. Here are some of the best reasons why pillowcases are necessary.
You’ll save laundry time
Obviously, your pillowcases serve as your first line of defense to help keep your pillows cleaner for an extended period. In case you’re not aware, humans shed skin cells, dander, and dirt on a daily basis.
For this reason, having a pillowcase helps you make sure that the down and feather inside your pillows won’t gather as much buildup as it would without a pillowcase. This means that you’ll be using cleaner pillows for longer and you’ll extend the time between your washings.
It blocks out dust mite allergens
Since dust mite allergens thrive in bedding, carpeting, and upholstered furniture, they could easily trigger symptoms of asthma and allergies. For this reason, using pillowcases with tightly woven fabric can keep the dust and dander from building up in the pillow’s filling. In other words, they can effectively block out dust mite allergens.
Your Personal Guide on How to Put a Picture On a Pillowcase
By engaging in this DIY project, you can customize the designs and layouts of your pillows. These are perfect for giving as gifts, and without a doubt, suitable for all occasions. Check out these detailed steps to see how it is done.
Step 1: Decide the fabric for your pillowcase
Before handling the photo processing, you have to choose the material you want your photo to be printed on. Keep in mind that your pillow cover needs regular washing. Therefore, the fabric for your pillowcase has to retain its quality despite this.
There are a few points to take note of when choosing fabric. Cotton fabrics and polyester are mainly chosen for their durability. Apart from this, they provide more comfort and are very easy to maintain.
Step 2: Prepare your photo
You can have a single photo printed for your pillow design. Or you can use a photo app to combine several photos and create a collage. You could also select just one photo, and present it tiled on the pane. For faces, place them in the center of the photo.
Whatever the photo pattern, the important thing is you choose high-resolution images so that the finished product will come out vivid. If you are using Photoshop or any other photo app, you may enhance the hues and colors beforehand.
Also, remember that the higher your photo resolution is, the better it is for your photo pillow. The minimum recommendation is, at the very least, 150 dpi (dots per inch). However, if you can reach 300 dpi, that would be much more preferable.
Step 3: Print the photo
Ensure that the size of your printed photo is identical to that of your pillow cover. For instance, if you’re hoping to have a pillow size of 18” x 18”, then your printed photo should be in the same dimension.
Your photo should be printed directly on the fabric. However, if you’re planning to use your home printer to do the job, it might not yield the best results for a couple of reasons.
For one, the size of your photo will be limited, and then there’s the problem with the ink. If it gets wet, home printer ink will run. A better option would be to make use of the services of a commercial printer.
Step 4: Finalize your photo
Once your photo has been custom printed, you need to make sure that the colors really stick. This is especially a problem after the initial wash. So immediately iron the fabric to make sure that the ink sets properly.
It’s now time to cut the photos into the exact sizes you need to make your pillow cover. Don’t forget that the individual photo must be the same size as your pillow insert. Otherwise, the design might not fill out perfectly on your pillow.
Step 5: Finalizing how to put a picture on a pillowcase
For your backing fabric, use plain cotton. It’s cheap, and it’s the top choice for those with allergies. Prepare two back pieces. Check if the front and back pieces are of the same height, with the back a bit wider than half the front, measuring 18” tall x 11” wide.
Hem the long edges of your back pieces. Press after folding ¼” under, then press a second time after folding ¾”. Finish with a straight seam. For the pillow cover, arrange the photo facing right side up. Cover it with the back pieces, facing right side down.
Place pins around the perimeter of the pillow cover. The sewn edges need to overlap in the middle. Sew your way around the dimension of the cover, adding a seam allowance of ¼”. Then flip your cover through the middle opening and insert a pillow inside.
Conclusion
Personalized photo pillows are ideal for immortalizing memories on your home decor, and learning how to put a picture on a pillowcase can be a worthwhile challenge. With this DIY guide, you can now keep special memories close to you, even while you sleep.
