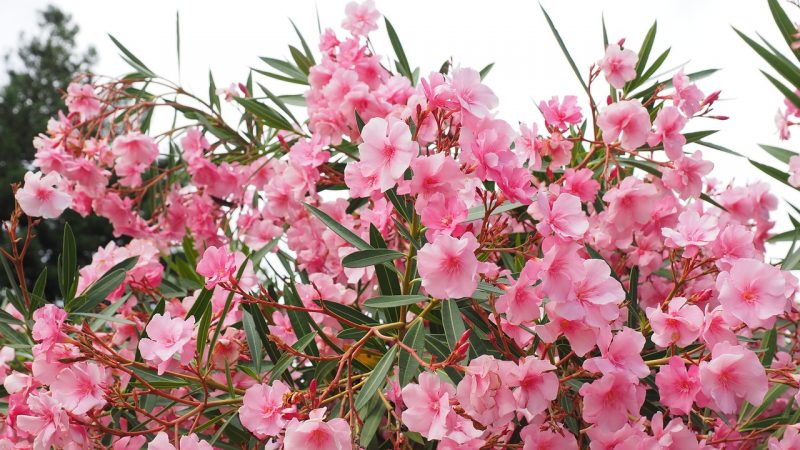
If you want to know how to plant oleanders, learn the three steps below to ensure healthy plants. These large flowering shrubs tolerate a handful of challenging conditions once established. This makes oleanders an excellent addition to your garden, especially as a beginner grower.
More so, don’t be intimidated in starting oleanders yourself because it’s not meticulous with requirements. You can also consider growing indoors to guarantee quicker establishment, regardless of the weather outdoors. This way, you can have vigorous oleanders ready for transplanting when the conditions outside are optimal.

Comprehensive Guide For Planting Oleanders
Step #1. Preparation
The first step in growing oleanders is preparation. Remember that oleander is a poisonous plant, so you need to be cautious in handling it. Wear long sleeves, gloves, and goggles to avoid making contact with it, and be mindful of pets and children around the area.
Once you are prepared yourself, the next thing to check is where you’ll plant oleanders. You can consider growing them in the greenhouse if the soil is not yet workable or if the climate is fluctuating. Oleanders adapt relatively well, but the location should be ideal, to begin with, to support newly-planted oleanders.
Choose an area with full sun to support healthy flowering and plant in soil with neutral pH to avoid issues. However, feel at ease that these plants can thrive in soil with salt or heavy texture types regardless. Lastly, provide adequate spacing and well-draining site to anticipate and prevent potential growing problems and diseases.
Step #2. Planting
The best time to plant oleanders is in early spring. However, you can also grow in fall or any time in the year, given that it’s not freezing or if you have a greenhouse. Choose a cloudy day so the plants won’t get stressed by direct heat and sunlight nor get damaged and dried out by winds.
Those who started oleanders indoors in containers must provide a hole that is twice the diameter of the root ball or pot. Provide a space of six feet apart and be mindful not to accidentally damaged the roots. You can also support the plant by adding stakes and ensuring adequate water for the newly planted oleanders by creating a hill to serve as a reservoir.
Step #3. Maintenance
As mentioned earlier, you must protect your oleanders from extreme weather until it has fully established itself. Adding a small hill will also act as a reservoir to keep them hydrated. However, don’t forget to water them thoroughly without directly targeting the foliage to avoid diseases.
Never overwater oleanders, especially when it’s raining or if the months are cool because it can lead to root diseases. On the other hand, you can boost the growth and flowering of oleanders by providing fertilizer and organic material that can also enhance the soil quality. However, be mindful of the label and adjust the mix according to other factors such as the soil and containers used.
How To Propagate Oleander
Seeds
You can propagate oleanders from seeds, but it’s crucial to handle the seeds carefully as they can irritate the skin. After the blooming period, collect the seed pods and let them dry to reveal fluffy seeds. You can remove these feather-like parts by rubbing the seeds against a screen until you have the brown seeds.
Start the seeds indoors to ensure germination, especially if you live in a cold area. Sow them on a seed tray with moist peat and then cover with plastic to create a humid environment. Place them under grow lights and keep the peat moist as needed.
You can expect the seeds to germinate after a month or three, and then you can remove the cover. Wait for the danger of frost to pass in spring and transplant outdoors. The seedlings should have formed true leaves, and you can plant them directly in the bed outdoors or larger pots indoors.
Cuttings
A faster way to propagate oleanders is by taking stem cuttings in healthy mature plants. You can do this throughout the growing season and take greenwood sections below a leaf node. A 6-inch cutting should suffice, but make sure to remove all the lower leaves to avoid rot when they contact the soil.
Some gardeners even nick the lower section to increase the surface area and encourage faster root development. Dip the end in rooting hormone and place the cutting in a pot with compost. Like germinating seeds, you can cover the pot with plastic to keep the area moist and humid.
You can then transplant in fall if you take the cuttings in spring, or transplant in spring if you took semi-woody cuttings in fall. Follow the instructions discussed for planting oleanders to ensure that they’ll thrive. More importantly, wear safety clothing to avoid contacting the plants.
Conclusion
You don’t have to feel intimidated in handling and growing oleanders yourself with proper precautions and techniques. After choosing a propagation method, you must know how to plant oleanders correctly to ensure that they will thrive well. It’s common to start them indoors and then grow in early spring on an overcast day.
Allocate the proper spacing and soil depth when planting oleanders. You can also stake and add hills for support and a water source to help them thrive. Keep the plants hydrated without overwatering and feed with fertilizer and organic material to boost their growth and flowering.
