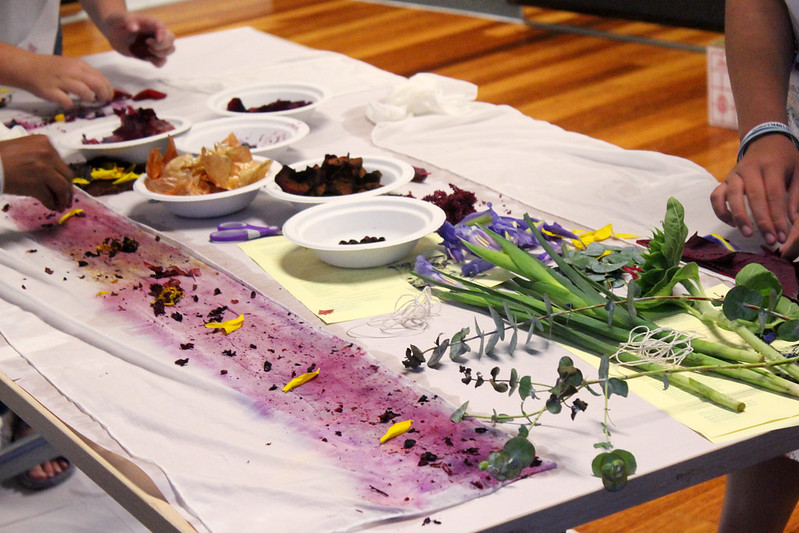
Eco dyeing is fun if you love nature’s patterns. For this, you need to know how to make an iron blanket for eco dyeing.
Iron blankets are essential in this dyeing process, and making one involves pretty cheap chemicals. Here’s a brief run-through of what you’ll learn about the iron blanket.

What Is An Iron Blanket In Eco Printing?
An iron blanket is any fabric, usually cotton, which is soaked in an iron solution to add iron to the dyeing process. The iron is essential because it will combine with the dye to make the prints stick more permanently on the cloth you’ll use to print.
Iron blankets are also called “carrier cloths.” The reason for doing this is because they carry or absorb the solutions, called mordants, to make the dyes or prints stick more permanently.
In this case, the mordant is the iron solution. You’ll know more about the specifics as you read. For now, let’s talk about making the iron blanket.
Steps In Making An Iron Blanket For Eco Dyeing
Making the iron blanket
Step #1. To start, you need to make sure the fabric you’ll use as an iron blanket is the same size as the garment you’ll dye. Afterward, get a large enough bucket or basin and fill it with warm water.
You can purchase ferrous sulfate, which is not very expensive, from a garden center. Put in one teaspoon for every gallon of water in the basin/bucket.
Another way to make the iron solution is to throw in rusty scrap metals such as old nails in the water. For better results, add vinegar.
Step #2. Soak the fabric in the iron solution for ten minutes. Make sure it’s thoroughly soaked so that you can distribute the solution evenly. Doing this helps prevent black spots from appearing on the iron blanket and affecting the design of your dye prints.
When the time has passed, wring it out. Your iron blanket is now ready to use.
Using the iron blanket
Step #1. If you’re new to eco-dyeing or need a recap, here’s what you’ll need to do to spruce up your desired garment. If you want the eco-print to be as colorful as you desire, make sure that you have already pre-dyed your garment by the time you make your iron blanket. If you want leaf patterns only, you can already start with the iron blanket.
Step #2. Arrange leaves on your garment any way you like. Once you’re satisfied, you can place the iron blanket on top, sandwiching the whole thing.
To prevent bleed-through, you can place a barrier on top of the sandwiched fabrics. The barrier could be recycled plastic or brown paper.
Step #3. Wrap the whole thing on a dowel and tie it with string or rope.
Step #4. Now you can either steam or boil the tied-up fabrics to enhance the dyeing process. Do this for about 90 minutes.
Step #5. When it’s ready, untie and unfold everything on a clean surface. Let it dry, and voila! You now have your very own eco print.
What Are The Best Leaves For Eco Printing?
It will delight you to know how blessed nature is with all kinds of decorative leaves that are great for eco-dyeing.
Fruit trees
To start, fruit trees such as cherry, plum, apple, and peach trees produce leaves that print beautifully on your fabrics. Leaves from berry plants such as strawberry, blackberry, chokeberry, serviceberry, and Saskatoon berry are also lovely additions.
Leaves
You also can’t forget leaves like chestnut, beechnut, walnut, and butternut. You may even want to take an unconventional route and use carrot leaves. Of course, you can never go wrong with prints from typical leaves such as birch, eucalyptus, maple, oak, sumac, willow, alder, or other decorative leaves.
Flowers or herbs
To add some more color to your project, you can also consider flowers or colorful herbs. These can include dandelions, irises, lilacs, tulips, violets, marigolds, catmints, and many other eye-catching plants.
The leaves and the flowers from the ones listed previously will surely make your eco-dyeing project pop and look more vibrant. Whatever leaves you’ll end up using, you may also want to consider which leaves you picked for the project are rich in tannins.
In a nutshell, tannins will allow color, usually ranging from yellowish to brownish shades, to seep better into the fabric to produce more defined prints. Picking leaves and plants for your eco print is a fun process when making the design you envision materialize.
Now that you know how to make the iron blanket, you’ll have a more effortless and fun time laying out the design and going about the process.
Conclusion
The whole process for eco dyeing is no doubt long. With that being said, it’ll be worth it to go through the process for an eye-catching result.
Not that you now know how to make an iron blanket for eco-dyeing, you may already have your checklist on the things you’ll need aside from the leaves. As with every other decorative project, it’s essential to have patience. Just remember to work carefully to avoid too much cleanup for stunning results.
