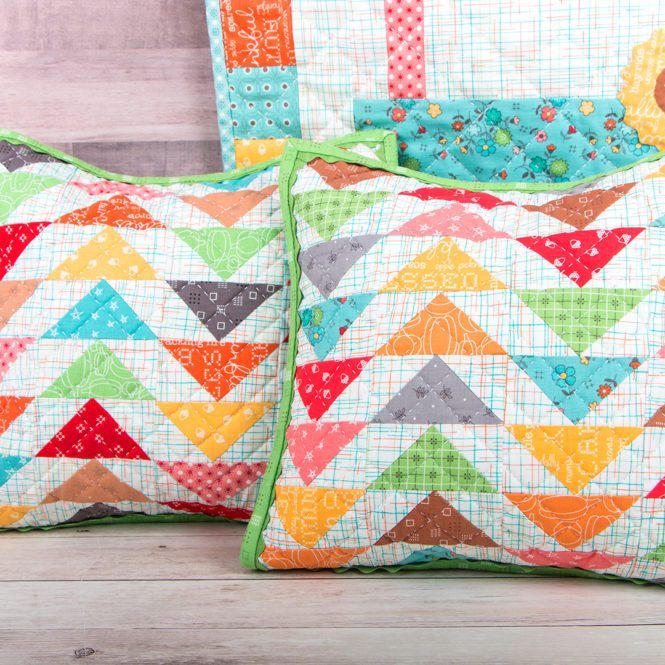
Knowing how to make a quilted pillowcase can be a handy skill, especially if you want to create a cover for your cushion with the fabrics you already have.
While quilting with new fabric is also fine, especially if you want a specific color, design, or texture, it is an activity that doesn’t require you to do so. You can instead utilize leftover cloth, old shirts, or reuse clean handkerchiefs.

How to Make Quilted Pillowcases
You can quilt to create decorative pieces, such as wall hangings and placemats, or stuff in your house, such as blankets, or in the case for this project, pillowcases. It is a fairly easy activity, but there are procedures that you are recommended to follow.
Step 1: Choose a pattern for the pillowcase
The pattern that you have selected determines the direction of this quilting project. There are tons of samples online, so if you have seen one that catches your eyes, you can recreate it and prepare fabric that matches the design.
Conversely, if you have already collected the old fabric, which you are going to use, look for patterns that would match what you have instead. Just make sure that the colors complement each other, or else the pillowcase will not be aesthetically pleasing.
If you have limited fabric designs, you can create alternating patterns using geometric shapes such as squares, triangles, or long strips. Regardless of the sample that you are going to follow, make sure that you have enough variety of fabric for it.
Step 2: Get the necessary tools and materials ready
Besides the cloth for the pattern, get a batting fabric, muslin, and back cover. For those three, there must be at least an inch of allowance on all sides. Prepare your sewing machine, needle, and thread, and measuring, marking, and cutting tools.
Step 3: Cut the fabrics and pin them together
Cut the fabrics in the shapes following the pattern that you have chosen and pin them together. The more complex the design is, the more pins you are most likely going to use. For you to not get too overwhelmed, work on smaller parts instead.
Step 4: Sew sections of the fabric and remove the pins as you go
Start sewing the individual sections one at a time and remove the pins as you go. After then, you can pin all sewn parts together so that the patterned front will be intact. Once all are attached, iron it flat so that the final product, later on, will look neat and smooth.
Note that there must be three layers of fabric just for the front cover of the pillowcase alone. The topmost layer would be the pattern, and below it is your batting fabric, then the muslin.
Step 5: Check before fastening the three layers together
Before fastening the three together, make sure that the pattern is exactly in the center of the other two. That means that your seam allowance should be equal on all sides. If you have a spray baste, you can use it on the layers to significantly reduce puckering.
Step 6: Sew these layers together
You can finally then proceed to sew all layers together. You can outline the pattern or stitch additional lines, depending on the design you desire. Once the front of the pillowcase is done, cut the batting and backing fabrics on the sides.
Step 7: Create the back of the pillowcase
It is now time to create the back of the pillowcase. Unlike its counterpart, this step is relatively simple. Align the fabric that you are going to use for this with the front cover in such a way that they are facing the wrong side out.
Step 8: Hem the ends
You are advised to hem the ends so that you can hide the rough edges and improve the overall appearance. In order to do so, fold the fabric allowance and start sewing using the blind stitch.
Step 9: Attach the front and back surfaces and sew them together
With your straight pins, attach the front and back surfaces except for one side that will be used as an opening. Sew them together and install the zipper on the remaining edge. Turn the pillowcase right side out, and your quilted pillowcase is done.
The Importance of Having a Pillow
We all know that pillows can help us get a good night’s sleep to prepare us for the day ahead. However, pillows are also important because they aid in the alignment of our upper body. Here are two of the most common benefits of using a high-quality pillow when you sleep:
Support
One of the main functions of a quality pillow is that it offers support for your upper body – from head, shoulders, neck, spine, and hips. If you have uncomfortable pillows, this could worsen any pains and aches you already have or it can lead to serious problems with your spine.
Comfort
Another benefit of pillows is the added comfort. After a long and tiring day, the best thing is having a soft, fluffy pillow you can rest your head-on.
The Bottom Line on How to Make a Quilted Pillowcase
If you want to merely make a fun project without spending much, checking out how to make a quilted pillowcase is a wise choice. After all, the essence of quilting is in creating something new, beautiful, and useful out of your leftover or old sheets of fabric.
