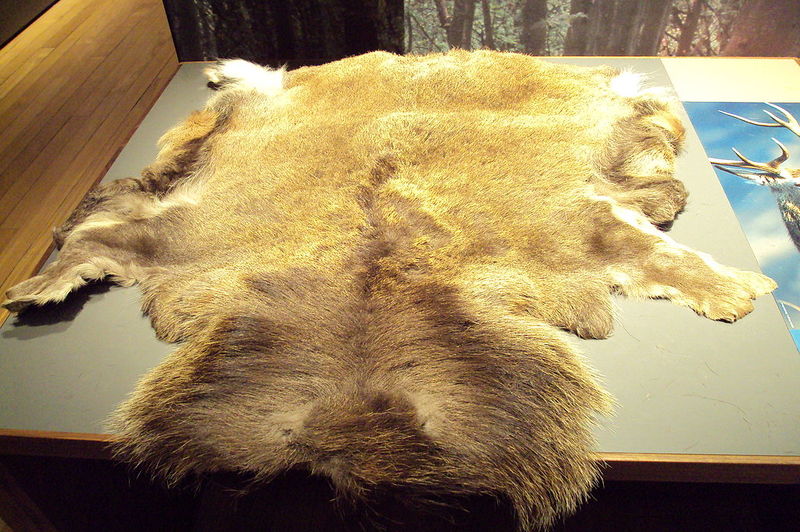
If hunting is your passion, you must know how to make a deer skin blanket if displaying antlers is too grotesque for you. Initially, the practice of using deerskin as blankets is an American Indian tradition. Today, showing a deer skin rug in the middle of the room evokes a sense of pride in its owner.
In this tutorial, you will learn how to make a gorgeous deer skin rug. Showcase your love for hunting by turning the leftover parts of a dead animal into something beautiful.

Materials Needed
Of course, this project needs a deer’s skin. Since the source is hard to come by, you must wait until hunting season, or if you get lucky, chance upon a dead one on the side of the road. As a hunter, be responsible enough and only hunt adult ones to allow premature fawns to grow and reproduce.
You will need a plank of wood to mount the deerskin to and hold it in place. In this case, prepare two pieces of wood measuring 2-by-4 inch, one pair about 4 feet long and another that’s 6 feet long.
To cut the thick slabs of wood, have a 6-inch metal blade at hand. Be warned of all the blood and flesh you will clean out of the skin. Prepare a big bucket to place the deerskin inside.
You’ll also need at least 1 gallon of non-chlorinated water—rainwater will do. It would help if you had other excess materials and tools. Using nails and a hammer will keep the deer in place so you can work on it.
If you prefer tying, a rope measuring 12-14 feet is beneficial. Tying it to the board with at least four nylon cords (30-foot) helps, too.
Finally, you will need a broad paintbrush with large bristles. It would help if you had a great stomach to withstand the gory process of crafting a deer skin rug. Also, be ready to get your hands dirty.
As you follow the guide below, remember that your goal is to preserve the animal skin in its pristine condition.
Easy Guide On Making A Deer Skin Blanket
Step #1. Stretch the skin
Let the wooden frame lay flat on the ground. Create holes at the side of the wood where you will let the nylon cord pass. With the skin pressed flat on the wood, pull the nylon strings until you stretch the skin to capacity.
Step #2. Dry the hide
Plan a strategy on when you will remove all the moisture in the hide. The cheapest way is by letting it dry during the summer season. This process is called “tanning.”
Find a spot where you can lean the frame to let it dry. A good place is beside a tree because it’s under the shade so that the hide won’t dry out faster. Also, protect the carcass from scavengers roaming around.
Step #3. Scrape off the flesh
With the sharpest knife you can find, gently scrape off the flesh from the skin of the deer. Scrape as much as you can until the layer of the skin becomes thin. If some membranes still cling to it, leave it as it is and proceed to tan the hide.
Step #4. Tan using the brain
It would help if you kept the brain of the deer earlier for this next step. If you discarded it already, an alternative is to buy two pig brains. You will mix the brain with rainwater in a blender.
With the flesh side facing you, grab your paintbrush and begin applying strokes of the blended brain. Then, check the hide if it’s damp. At this point, your flesh must be dry for it to absorb the solution like a sponge.
Step #5. Apply coats of brain
You will apply a thick coat of the mixture to the flesh. After doing so, you have to wait an hour before applying another coat. Then, wait another hour.
Step #6. Let the hide cool and dry
Overnight, the hide should suck all the brain bits. In the morning, once dry, apply another coat and wait another hour. Once you notice the leather all dried up, place wet rags on top of the fleshy side and dry directly under the sun.
Step #7. Soften the hide
With the rope, pull the hide to and fro and roll it over repeatedly. The skin should soften eventually, although the process itself is labor-intensive and time-consuming.
Do deer hides improve the quality of the blanket?
More than the warmth it provides, the look of deer hide on the shroud makes it sought after. The leather makes a good enough blanket.
If you want the blanket to function more like a blanket rather than a decoration, adding liners can help. For added warmth, you can stitch materials like fleece and flannel under the hide.
Conclusion
There, you already know how to make a deer skin blanket easily. Now, you can brag about your latest hunting victories over your friends once you put the rug in the living room. Any guest will admire the beautiful deer skin you crafted.
