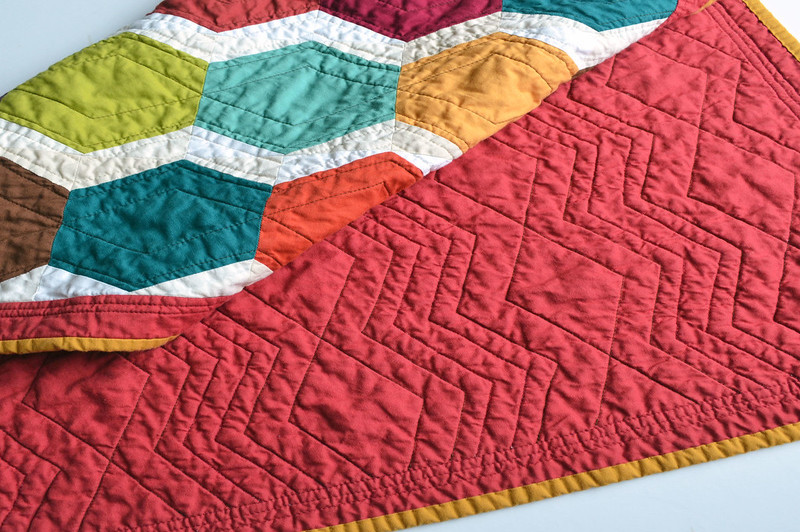
Babies love soft things. If you’re a quilter with a little one, it’s essential to know how to machine quilt a baby blanket for them to snuggle with.
You’ll need a sewing machine, quite a few fabrics, and some patience. If all goes well, your baby will bask in the comfort of a newly quilted blanket in no time.

How Do You Machine Quilt A Baby Blanket?
Whether it’s your first time quilting or you need a recap, you need to invest in different fabrics for all the blanket parts.
To start, you’ll need the main fabric that will serve as the centerpiece of the blanket. Regarding measurements, the average starting size for a baby blanket is 40 to 42 inches, so you need the fabric to measure around this range.
You’ll also want a fabric for the backing or reverse side. The material will serve as a good complement for the main design or pattern. Measurements around 1 and ¼ to 1 and ½ yards should suffice.
Next is a binding fabric. This material will help hold the blanket together. You’ll need around 1/3 to ½ yard of this.
You’ll also need batting. The purpose is to ensure the blanket is soft and comfy on the inside.
Forty-two inches is a suitable measurement. Remember, the quality depends on the material, so decide what kind of batting will suit the baby. Last but not least, you’ll need pins, of course.
You might be thinking of pre-washing the fabrics before you start the project. It’s a good idea, no doubt, but many high-quality fabrics are color-safe. You won’t have to worry about pre-washing too much.
Step #1: Sandwich the materials
Start with the backing fabric. You probably have already noticed that its size is slightly bigger than the main fabric.
The reason for this is you start machine quilting from the blanket’s top, and everything beneath can move a bit during the process. If your backing is bigger than everything else, it won’t come off smaller than the front by mistake.
Lay the backing flat on the floor. When it’s all smoothed out, place the batting in the center. Repeat this with the main fabric.
Make sure they’re all appropriately centered. You should be able to see all three layers of this “fabric sandwich.”
From here, you can use pins to keep them in place.
Step #2: Stitch the layers
At this point, you can now let the machine do the work. Stitching is also the part where you get creative.
It may seem like you’re just trying to stitch the three layers together at first glance. However, the beauty of quilting comes in here as you can decide how the stitches will look on the quilt. This kind of creative control is why there are many ways to stitch a quilt.
When you’ve finished stitching, you don’t stop there. Remember the binding fabric?
Step #3: Bind the quilt
Binding is a rather tricky task. With a bit of patience, you’ll get the whole blanket finished and looking good.
Cut out the binding fabric into strips that measure 2 and ½ inches x the width of the blanket. Sew all the strips together by the shorter sides. Fold the result in half and press it down.
You can start pinning the binding on the blanket starting from the middle of one side. Make sure to place the binding on the front side. Start gradually pinning the binding to the side of the blanket.
When you reach a corner, stick a pin and fold the binding 45 degrees opposite the adjacent side. Fold it back into itself so that it aligns with the adjoining side and stick another pin. You should see a triangular flap on the corner.
When you reach the starting point, take both ends of the strips and fold the ends down. Don’t forget to pin both folds down.
Make sure the two ends still meet. You may want to press this part with an iron to make the folds crease.
Cut off any excess to about ¼ inch from the folds. Take off the pins, match the strips’ right sides, fasten with a pin again, and sew a seam on the crease. Open the fold, press it down, refold it, and pin it back again.
Now you can start sewing the binding in place. Start sewing with a ¼ inch allowance, removing pins as you go.
When you get to the flaps, stop when you’re ¼ inch away. Rotate the blanket and make sure the flap is in the opposite direction. Sew the next seam by the edge of the last side.
Once you’ve finished sewing, fold the binding over to the back. At this point, you’ll have to sew it to the backing by hand.
There you have it! Once you see how the blanket has turned out, you can congratulate yourself for a job well done.
Conclusion
Quilting sure is challenging, but who doesn’t love a challenge? It’ll be worthwhile once the lucky recipient feels nice and cozy rolling around in it. Now that you know how to machine quilt a baby blanket, your little one will be in for a treat!
