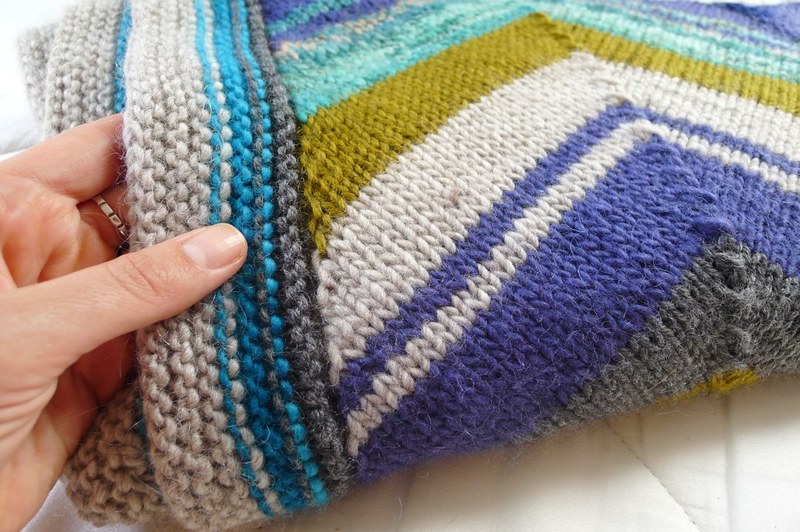
You need to align your increases and decreases as you go along and work on the alternating rows. That is how to knit a Chevron blanket.

This pattern is great to try once you have mastered the most basic stitches.
Now that you know all the garter and stockinette stitches, you’re looking for something a little more challenging. What is a pattern that shows class while not being too flashy?
That pattern is the Chevron stitch for you! These zigzag lines are appealing and add texture to your garments, and you can use them on any piece like Afghans, hats, shawls, or scarves.
What Is A Chevron Pattern?
We know they look good, but where did the Chevron pattern originate?
It’s believed to be a modification of the Herringbone pattern. These styles date back to as early as ancient Egyptian jewelry and textiles.
Looks like the pattern has always been appealing. The name “Chevron” has French origins for its resemblance to building rafters.
What makes them different is the way they change direction. The Herringbone pattern has a more staggered zigzag effect.
What Materials Do You Need For A Chevron Blanket?
You don’t need any special tools for a Chevron blanket because the style’s beauty comes from your hands!
Just use the usual needles and yarn you have for other coverings.
An appropriate needle length for this pattern is US size 9 (5.5 mm). This needle will allow you to make several knots in one row.
Worsted weight yarn is a good choice because of its resilience to stretching. It’s also ideal for a blanket as it insulates heat, perfect for a chilly night on the sofa.
Types Of Chevron Stitches
There are so many stitch types to choose from! When you know the basics, you can try exploring some of the other designs.
-
Slip stitch
This type of stitch is usually found in scarves, hats, or sweaters. It adds a raised texture to your work, and it’s simple enough for a beginner to follow.
-
King Charles brocade
It is a series of purls and knits that form a diamond pattern on your piece. It gives your work a sophisticated look, and it’s incredibly versatile.
-
Chevron lace stitch
This pattern is more open, and it’s perfect for a scarf or hat. Your laces will have space, and you will be able to see the stockinette portion of your work.
-
Feather and fan stitch
This is another lace stitch, and it’s a four-row repeat. You will need to do several repetitions for this pattern, and you can use it as a decoration for your shawls or scarves.
Step-By-Step Process On How To Knit A Chevron Blanket
The way to get the Chevron effect is by working on the alternate rows. They have different styles you can follow.
Step #1. Work on the odd number rows
Cast your stitches by purling all of them. Do this on every other row of your blanket.
Step #2. Work on the even-number rows
Do an edge stitch from the front, then pick it from the back. You must make around four stitches after that.
Bring the right side over the left, then knit two stitches together. Repeat another four, then make an edge stitch.
Step #3. Repeat alternating until you have the correct size
Continue this process until you have the right-sized blanket. A typical baby blanket is 27.5 by 36 inches, though you can make it bigger by adding 24-stitch repeats.
The repetition of stitches is what makes this a simple pattern for beginners to follow. You will have a beautiful blanket that’s the talk of the town!
How To Care For A Chevron Blanket
Now you have your beautiful blanket, how do you make sure that it’s kept in good condition? How should you wash it?
It all depends on the type of yarn you use for your blanket, but for wool which is what you use for a Chevron, hand-washing is the best option.
Step-By-Step Process On Washing A Chevron Blanket
This blanket is usually made of Worsted wool, so you have to be careful it doesn’t get destroyed when you clean it.
Hand-washing is gentle and effective at removing dirt; that’s why it’s the best option.
Step #1. Place your blanket inside the tub or basin
Prepare your tub and fill it up with cool water. Add a little mild detergent when you have everything ready.
Place the blanket inside and swish it gently. Let it soak for 15 minutes.
Step #2. Drain the tub
Swish water through your blanket, then repeat draining until all the suds are gone. Press out excess water by squeezing gently without wringing it.
Step #3. Let it dry
Place a shower curtain or plastic sheet on the floor and lay your blanket on top. Let it dry for 24 hours with the help of a fan if necessary.
Conclusion
This stitch is excellent for beginners to try. When you learn how to knit a Chevron blanket and care for it, you will have a beautiful piece of fabric in your home.
This versatile pattern will allow you to make beautiful creations.
