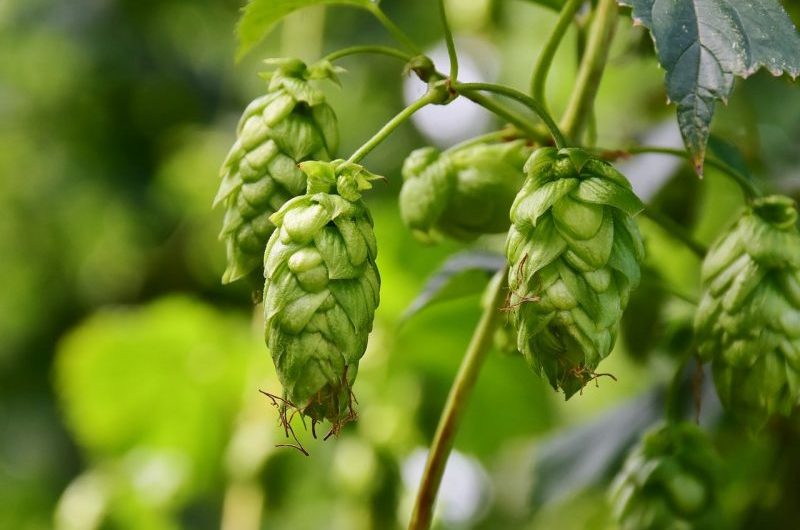
Learning how to grow hops in pots using three steps is a potentially useful skill. While some growers focus on high-scale production, the University of Kentucky saw the equal importance and advantage of being a small-scale grower. In fact, you can easily target where you can supply your hops by growing at a reduced number.
Growing hops can be a profitable venture, and you don’t have to allocate a considerable acreage to try this production. With this article, you can produce hops in pots and still ensure good quality in your yield. Those who have limited space can use a greenhouse or any secured location to grow hops without much hassle.

Comprehensive Guide For Growing Hops In Pots
Step #1. Preparation
The first step in growing hops in pots is preparing the site and containers. Ideally, it’s best to choose a location that has full sun for optimal production. However, you don’t want to subject your crops to challenges like winds because this damages the vines.
You can consider having the pots in the greenhouse and adjust the necessary growing requirements and maintenance for hops to ensure that they produce quality flowers and fruits. And once you secured the location, prepare well-draining pots filled with a mix of potting soil and perlite.
Insert stakes into the medium with adequate spacing according to the size of the pot. Tie hop twine on each stake so that you’ll end up with a criss-cross pattern between them. Finally, cut the end of the twine and tie them together.
Step #2. Planting
Depending on your pot’s size, dig a hole at the base of each stake to receive the hops rhizome. Lay the rhizome in place before covering it with potting soil and watering up to four inches deep to support growth. At this point, let the soil dry between waterings but ensure soil moisture at the top two inches.
Growing in the greenhouse also makes it easier to support the rhizomes because maintaining the temperature around 68°F is easier indoors. One can expect growth in as early as two weeks, and then you can soak the pots through the drainage holes once the plants develop vines.
Step #3. Maintenance
As the hops develop vines, maintain soil moisture at the top three inches of the medium. Adjust the watering frequency according to the weather, but be mindful of drowning the plants. After some time, you can also start training the vines over the twine and stake.
You can do this by looping their ends over the twine and around the stake and adjust every two weeks until they can grow along the trellis. Boost your hops by feeding with diluted fertilizer every four weeks from the time of vine emergence to fruiting. However, don’t forget to water after each feeding to prevent burning the roots with fertilizer.
Another maintenance practice to remember when growing hops in pots are preventing the vines from overgrowing your trellis. This will cause problems such as infestations and diseases because of poor air circulation and drawbacks in growth due to cramped roots and plants. Prune the tip of the vines and remove the bottom foot of the foliage as needed.
How To Choose Hops For Pots
A useful tip for choosing hops varieties to grow is consulting your buyers and other fellow producers. With the former, you can secure a market, while on the latter, you’ll gain insights on what varieties are best for your area. Remember that each region varies in climates and soils that will support specific hops varieties.
You also want to consider if you’re going to start with rhizomes or crowns. With the guide discussed above, you can use rhizomes for pots, but note that crowns are fully developed plants. Therefore, starting with rhizomes will mean a longer waiting time, but a drawback in starting hops crowns is that they are not easy to avail.
Pots And Trellis Requirements For Hops
Growing hops in pots can be limiting in space because you must provide enough room for their roots. Therefore, make sure that you’re using a pot that is at least 20 inches in diameter to prevent roots’ cramping. The trellis or stake should also be around 1 x 2 x 8 inches and a #6 hook and eye is recommended by experienced hops growers.
As mentioned earlier in the guide, you also want to provide the appropriate medium and fill the pots. Remember that the growth of roots depends not only on the pot size but also on the medium’s drainage quality. Once you have a quality mix, allocate two cubic feet of it for every 20-inch container with one rhizome and two cups of liquid fertilizer through the growing season.
Conclusion
If you want to venture into hops production but have limited space, you can still gain profit sufficiently. Knowing how to grow hops in pots can even be as simple as three steps to get you started as a small-scale hops producer. Start by preparing the site and containers to ensure that they are optimal for hops.
The trellis should also be well-established, so you can train the vines once they are the appropriate length. Another crucial part of growing hops in pots is ensuring that the medium stays moist without overwatering and damaging the plants. Then, you can fertilize and prune hops as necessary to keep their health in the best conditions.
