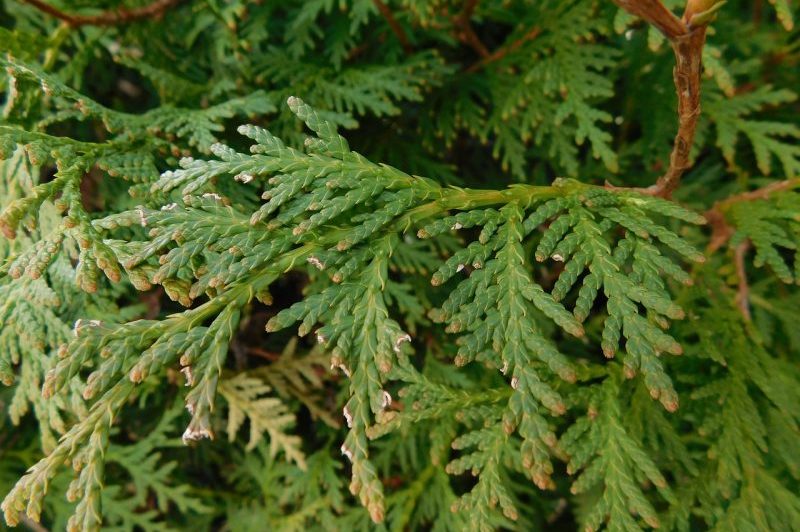
If you’re interested to know how to grow arborvitae from cuttings, you only need to master three steps. Arborvitae is one of the most low-maintenance plants, so it’s not surprising that many gardeners are taking an interest in growing them. However, the easiest way to propagate them is from cuttings.
You may also find it advantageous to root arborvitae in the greenhouse. Remember that cuttings require a stable environment to develop roots. Therefore, starting plants in the greenhouse would make establishment quicker.

Before anything else, it’s important to emphasize there are different species under arborvitae. While this three-step guide is the general technique for growing arborvitae from cuttings, do the necessary adjustments and modifications to the methods according to the species that you are growing.
Step #1. Cutting collection and preparation
Taking arborvitae cuttings is no different when you’re collecting sections from other plants. You want to select a healthy plant to ensure that it won’t get stressed after clipping its stem. Use a sharp and sterile knife to cut a tip of a branch at around 6 inches long at a 45-degree angle.
Remember to check the stem itself for any damage and use clean tools to prevent the transmission of diseases. It would be best to take the section from a branch with new green growth at the tip but mature bark at the base for better rooting. Once you have taken the cuttings, prepare it for planting.
You want to remove the leaves at the bottom part of the cutting and create a new cut to make more free contact between the soil and roots later on. More so, removing the leaves at the bottom half will prevent rot. You can also apply rooting hormone powder on the part where you remove the foliage at the end to encourage rooting faster.
Step #2. Rooting
You should be ready to insert the cuttings in nursery pots after preparation. However, remember to prepare your containers with moist sand beforehand to prevent the cuttings from drying out due to waiting. Perhaps the most significant problem you must avoid in growing arborvitae from cuttings is letting them dry out and using a dry medium.
Insert the cutting in the middle of the pot at a depth reaching half of its length. Firm the sand around the cutting to keep it upright and mist the cutting with water once more. To help create a moist environment crucial for root development, cover the container with a plastic bag, but make sure that it’s not touching the cutting.
Step #3. Maintenance
An advantageous location to place the pots with arborvitae cuttings is the greenhouse. This way, you can keep them somewhere bright and warm but out of direct light. More so, the cuttings are sensitive to harsh climates such as wind and rain, and using the greenhouse will protect them as they develop.
The maintenance practices left at this point is ensuring that the cutting is well-hydrated. Some gardeners even recommend misting every two hours. Usually, arborvitae cuttings will root by six weeks, and you can test this by gently tugging the base of the stem for resistance.
Please wait for a month after the cuttings develop root before transplanting it to a container with potting soil. At this point, you must acclimate it gently outdoors before transplanting permanently outside in spring. The emphasis is necessary on keeping them somewhere partially shaded before the permanent transplanting to avoid transplant shock.
Caring For Arborvitae
Location
An area that receives full sun is best for growing arborvitae, and like most plants, you want to use a well-draining and fertile soil for your arborvitae. You can test your soil as well for its water retention quality, nutrients, and pH level. This way, you can make the necessary amendments to improve its structure, nutrients, and pH level.
You can also keep your plants in the greenhouse if your soil is too long to be workable after the freezing season. Remember that the root system can get damaged under harsh conditions. Once you’re sure that it’s safe to grow outdoors, anticipate the spreading of arborvitae roots when digging the area for them.
Water and fertilizer
As your arborvitae are growing, watering frequently is necessary to support them. This is especially crucial in the summer when the climate is dry. Drought damage is even a common problem with arborvitae.
More so, spraying the foliage themselves should keep pests like spider mites at bay. On the other hand, you can fertilize arborvitae with an all-purpose feed in spring to further help its health. Some other instances where arborvitae will benefit from fertilizing are poor coloration, establishment, damages from pests and diseases, and slow growth.
Conclusion
Arborvitae is composed of different species that will satisfy your shrub collection. Therefore, it’s advantageous to know how to grow arborvitae from cuttings to help you create more plants for the garden. You can simplify the process into collecting the cuttings, rooting them, and general maintenance.
Remember to select a healthy section and prepare it before planting it into a moist medium. You can cover the pot with plastic and place the cuttings in the greenhouse to protect from unstable and harsh climates. Afterward, don’t forget to acclimate them before permanently transplanting outdoors.
