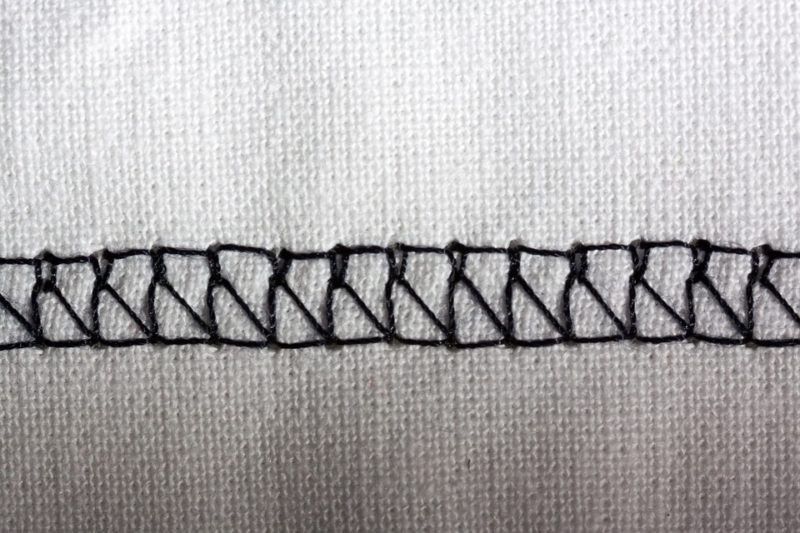
If you want to learn how to fix zig zag on sewing machine, identify the three common issues. In this article, we’ll solve loose zig zag stitches, deformed zig zag stitches, and fabric puckering when you’re making this type of stitch in the sewing machine.
The zig zag stitch is among the most versatile stitches to make. Therefore, it’s always helpful to know how to fix this type of stitch when issues arise.

In the meantime, you can also read or bookmark how to repair a sewing machine at home for common issues and how to solve them.
How To Fix Zig Zag Stitches On Sewing Machine
Loose zig zag stitches
Reason
The zig zag stitches on the front or back of the fabric are loose, and the potential cause is the threading of the sewing machine. You can also check if the tension you set was appropriate for the stitches and material.
Solution
Learn how to thread the specific model you have, ensuring that you follow the sequence for the thread guides until you reach the needle eye. You can also adjust your sewing machine tension, depending on which stitches were loose, whether they’re the ones on the fabric front or back.
Deformed zig zag stitches
Reason
The zig zag stitches can look deformed or not uniform because the thread tension for each row is also unequal. Remember that with thread tension, you want the needle thread visible only on the top of the fabric and the bobbin thread only on the bottom of the fabric.
Solution
Refer to the sewing machine manual on how to adjust its tension. Typically, you will move the dial to a higher or lower number to change the thread tension, and adjusting the bobbin tension is unnecessary.
Fabric puckering when sewing zig zag stitches
Reason
The fabric can pucker when you make zig zag stitches if the material itself is too light to support the threads used by these stitches. You can read what causes fabric puckering since this issue is not only common when sewing zig zag stitches.
Solution
Use a medium to heavyweight fabric for zig zag stitches. You can also add more structure to your material with a stabilizer.
Why Is My Sewing Machine Not Sewing Zig-Zag Stitches?
The sewing machine is not set up correctly
Make sure the sewing machine is clean and well-lubricated. There might be debris and lint buildup on the bobbin area, affecting the zig zag stitch setting.
You also want to oil the moving components of the sewing machine. Otherwise, the needle can fail to move or make precise zig zag stitches.
Finally, ensure that you’re using the correct needle, thread, presser foot, and even stitch settings. They should be compatible with each other, and the material, then set your stitch length and width accordingly.
The sewing machine tension and timing are needs to be adjusted
If your sewing machine timing is incorrect, the presser foot and feed dogs won’t work correctly to make zig zag stitches. You may need to reset the timing via the designated screw or whatever was indicated in the manual.
On the other hand, the wrong sewing machine tension can cause the machine to make irregular zig zag stitches as well. Always start with the middle tension setting, then sew on a scrap fabric piece to know whether to tighten or loosen the tension.
Why Is My Zig-Zag Stitch Bunching?
The most common reason for zig zag stitches bunching is the fabric lacks stability. Lightweight fabric won’t be able to withstand the threads of the zig zag stitches.
Here are also other steps to solve zig zag stitch bunching:
- Check how you threaded the machine and rethread it
- Inspect the parts of the sewing machine if they are installed correctly without damages
- The needle shouldn’t be blunt or bent and replace if necessary
- The needle and thread are suitable for the fabric
- Loosen the upper thread or needle tension a bit
- Reinforce the zig zag stitches with a straight stitch at the beginning and end
- Use shorter stitches
- Add a stabilizer under the fabric you’re sewing
How Do You Adjust A Zig Zag Stitch?
The settings you’ll use for the zig zag stitch depend on what you’re doing. For example, zig zag stitching the seams is ideal with medium length and width.
On the other hand, set your stitch length to something shorter when sewing appliques with zig zag stitches. Long zig zag stitches will then be preferable if you’re sewing over trims.
Overall, always test your stitches on scrap material beforehand. From there, adjusting the stitch length and width should be straightforward with their dedicated buttons on the sewing machine.
Conclusion
Did you learn a lot from this article? We discussed how to fix zig zag on sewing machine and helped you solve the common issues with zig zag stitches.
If your zig zag stitches are loose, you might need to rethread your machine. On the other hand, deformed stitches are a potential indication of tension issues, and fabric puckering is common when sewing lightweight fabrics.
And finally, general setup and checkup of the sewing machine can potentially fix it if it won’t make zig zag stitches. We hope this was a helpful read; leave us a question if you still have any.
