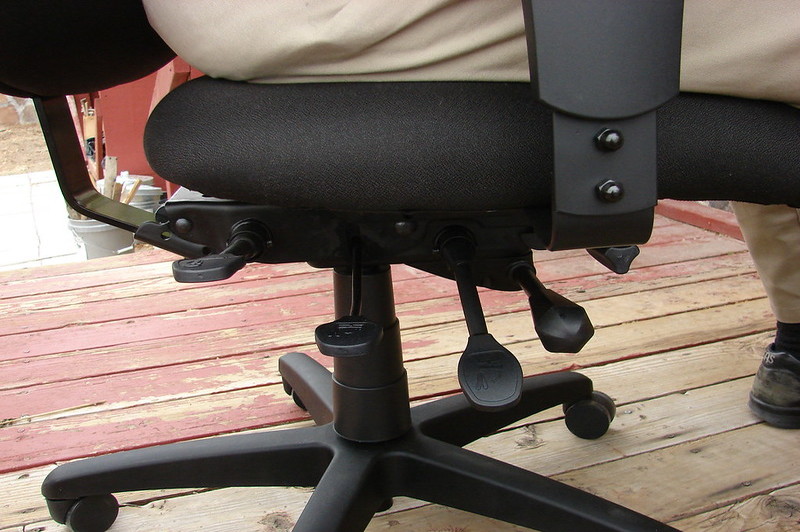
There are different reasons why you may want to learn how to disassemble office chair: you might be transporting it to a new location, trying to return it to the seller, or simply trying to put it in a box for storage. Whatever the reason, there are some things that you have to consider to take your chair apart and make it more compact.
To make it easier, just follow the original assembly instructions that the chair came with. However, if this is not possible, you can learn to disassemble your office chair by following the instructions below:

A Step-By-Step Guide In Disassembling Your Office Chair
Step #1. Disassemble the headrest
Most headrests are attached to the chair with a few bolts. To disassemble your headrest, check to see if you need to remove a cover plate or tab.
Once removed, use a screwdriver or an Allen wrench to remove all the bolts from the headrest, then place the cover plate or tabs back onto the chair. Remember to put all the small, loose parts in a bag for safekeeping.
Step #2. Disassemble the backrest
Most office chairs should allow you to remove the backrest easily as they are attached with bolts at the back of the chair. However, on some office chairs, these are not removable because they may be attached to the frame. For office chairs with removable backrests, use an Allen wrench or a screwdriver to remove the bolts underneath the chair that held it in place.
Step #3. Disassemble the armrests
The armrests only need to be removed if absolutely necessary. They can contain multiple parts, so it is best to remember the order of taking them off the chair. Start by removing the armrest bolts from the chair with the use of the screwdriver, and then proceed with the washers or plates.
Step #4. Disassemble the cylinder and base
The cylinder of the chair can easily be damaged, so make sure to be careful. Use a large pipe wrench to clamp down the cylinder near the bottom of the mechanism.
Once tight, turn the wrench until it becomes loose. Cylinders don’t usually screw on, so make sure you loosen them until you can pull them away from the mechanism.
To remove the cylinder from the base, turn the base upside down and use a rubber mallet to dislodge it from the base. If the cylinder is not coming out, tap the sides to help loosen it from the base.
Step #5. Disassemble the casters
Most casters can be popped right into the base. However, you should not have to remove them unless you need a replacement or a return.
To remove the casters, simply place the base upside down, with the casters facing up. Pull them up to remove them from their slots.
Things To Consider When Disassembling The Office Chair
When disassembling the office chair, it is crucial to remember how your chair arrived. Some office chairs come in multiple pieces so that you can disassemble the chair in the opposing order of assembly. Here are some things to remember when disassembling the chair:
Do not disassemble what is not necessary
Think about why you need to disassemble your office chair. Ideally, try to disassemble your chair as little as possible to prevent any damages, and never disassemble parts inside the mechanism. There are also parts that you shouldn’t remove because they could cause damage to the chair and cause it to malfunction.
Remember how things connect and disconnect
You should be able to tell whether or not the parts have to be removed. If you assembled it with screws, you should take those parts off, such as the headrest, backrest, or armrests.
However, the parts that are connected to the mechanism without screws may be more difficult to remove, such as the cylinder. The cylinder is only secured by tension, so it can be challenging to take it off if you’re not careful.
Tips For Disassembling The Office Chair
Here are some tips that can help you better disassemble your office chair without damaging or losing parts.
Tip #1: Be organized
Put small parts of the chair, such as the screws, in a sealed bag so that you won’t lose them. Also, remember to protect the chair and the surface you’re disassembling it on using an old blanket or discarded cardboard.
Tip #2: Get a grip
Use duct tape to the teeth of your pipe wrench to get a grip without damaging or scratching the cylinder.
Tip #3: Reference assembly instructions
Suppose you’re having a difficult time disassembling your chair. In that case, you can use the assembly instructions, which are usually available upon purchase of the chair or online, depending on the manufacturer. Simply follow the instructions in reverse order to figure out how to disassemble your office chair.
Conclusion
Remember to handle it with care when you are learning how to disassemble office chair. Try not to disassemble parts if not necessary to avoid damage.
If you have the assembly instructions available, simply work your way backward. If you are not sure what to do, it is best to contact your chair manufacturer for guidance.
