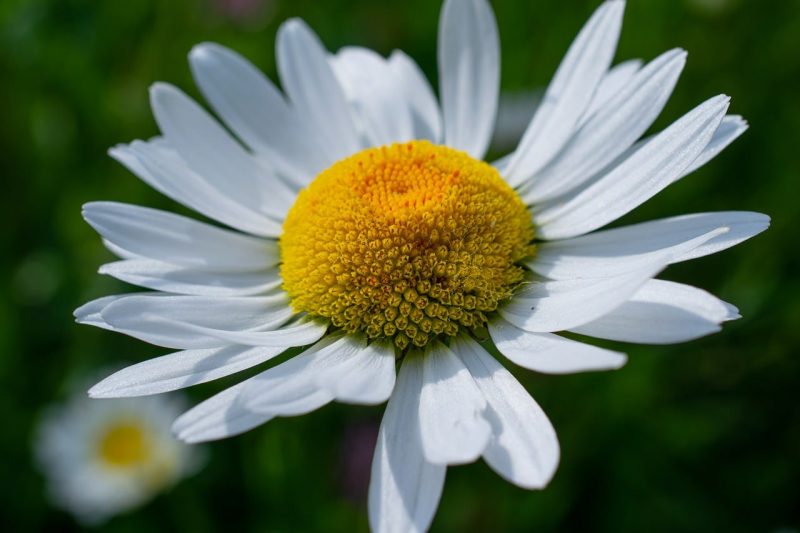
Are you interested to know how to deadhead Shasta daisies? Native in Europe, Shasta daisies can now be found throughout North America. These flowers return every spring or early summer season and bloom until the beginning of fall. Deadheading Shasta daisies throughout the growing season is essential to ensure that your plants are focusing their energy on producing healthier and continual blooms.
Keep in mind that Shasta daisies are aggressive growers. Choose a variety of daisies that don’t produce viable seed, or you can also cut flowers before they go to seed. It’s best to keep them contained in garden beds or a greenhouse since they’re prone to spreading and they aren’t native to the area.

Daisies grow by clumps that can be as tall as two to three feet and up to two feet wide. They produce flowers with white petals and yellow disk florets in the middle. Shasta daisies grow glossy and dark green foliage. Florists love working with Shasta daisies because they work well as cut flowers that last for more than a week in arrangements.
Deadheading Shasta Daisies
As mentioned, deadheading Shasta daisies improves the overall appearance of your daisy bush and encourage new growth and more leaves. Regular deadheading also extends the flower season, so your plants will produce heavier and longer-lasting flowers.
Every gardener should know how to deadhead plants. Fortunately, deadheading Shasta daisies are relatively easier compared to other types of plants.
The best time to do so before the flowers die back completely. If you see the flowers begin to fade, wilt, or become brown, it’s a sign that you’ll need to deadhead your plants. You can cut the flowers using sharp gardening shears for the best results rather than pulling and pinching.
Once you notice that the blooms are turning brown or seed heads have formed, remove them all and leave the first set of leaves. For example, if healthy flowers or buds are near dying flowers or leaves, cut them until it meets the other stems.
Step-By-Step Guide on Deadheading Shasta Daisies
Shasta daisies produce a single stem per flower, so it’s better to cut the stem to the base of the plant where it meets the first set of leaves. Deadheading promotes new growth and more blooms. Here’s a step-by-step guide on how to deadhead Shasta daisies:
Step #1:
Examine your Shasta daisies for withered or dead flowers.
Step #2:
Take note of the flowers that have dried and curled, as well as discolored flowers or fallen petals.
Step #3A:
If you’re using the pruning method, trim the spent flower by cutting the stem right above the next set of leaves or the stem joint underneath the flower.
Step #3B:
On the other hand, you can use the pinching method if you don’t have gardening shears available. Use your thumb and foreigner to pinch the dead flowers on the stem right below them.
Step 4: Gather the trimmed flowers and place them in a bag. You can throw them away or use them as compost for your garden.
Tips to Remember When Planting Shasta Daisies
Growing Shasta daisies doesn’t require much care and attention. But to ensure that your flowers will grow healthy, here are a few tips you should keep in mind:
Starting from seed or plant
There are two ways to plant Shasta daisies: starting from seed or plant. If you’re seeding directly, you can expect flowers to bloom the following spring season. On the other hand, if you choose to buy a young Shasta daisy, it’s best to plant them in spring or early fall.
Choosing a location
Shasta daisies grow best under full sun. The soil should be fairly fertile; too much fertilizer will give you more vegetation than blooms. Be sure to water your plants regularly – just enough to keep them moist, and plant your daisies in well-draining soil. Loosen the soil to promote oxygenation and dig to a depth of 12 to 14 inches and top with two to four inches of compost.
Planting Shasta daisies
When planting Shasta daisies on the ground, space your plants about one to two feet apart. The top root ball of your daisy plant should be level with the soil’s surface. Place soil around the root ball to cover it and water deeply. Keep in mind that you may need to support or stake taller plants.
Why Grow Shasta Daisies in a Mini Greenhouse?
There are several reasons why you should consider growing Shasta daisies in a mini greenhouse. Even though daisies are generally low maintenance and disease-resistant, they may still be susceptible to aphids, slugs, leaf spots, earwigs, and chrysanthemum nematodes. If you grow your daisies in a mini greenhouse, it lowers the risk of insect infestation and disease development.
Weather also plays a part in the growth of your Shasta daisy plants. Heavy rain, frost, snow, high winds, and storms can easily damage or uproot your flowers. Placing them inside a greenhouse protects them from the elements. You can transplant your plants outside when the weather warms or continue to grow them inside the greenhouse.
Final Thoughts on How to Deadhead Shasta Daisies
Deadheading is a crucial part of growing healthy plants. Knowing how to deadhead Shasta daisies ensures that your plants will grow beautifully and that they’ll produce many blooms.
