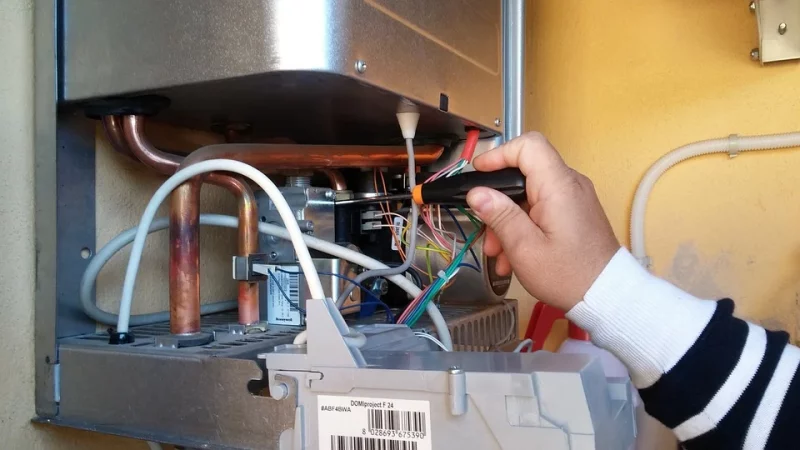
Do you want to know how to change heating element on Atwood RV water heater since you’re having problems with the water heater on your RV (Recreational Vehicle)? First, all you have to do is disconnect the power source from the water heater and drain all the water inside. After locating the heating element, you can slowly take it out and replace it with a new one. Depending on the specific Atwood RV water heater model, you can access the heating element outside the RV or inside.
Regardless of why you have to change the heating element on your Atwood RV water heater, do not worry because we will guide you through the steps you would have to take. We also recommend reading the owner’s manual of your water heater unit if you can.
You can also ask the retailer of your RV or its water heater about the basic things that you have to know as its owner. If not, you can always ask the internet questions, just like reading this article on the internet to figure out what you need to know. To find more details on this topic, keep reading until the end.
What Is An Atwood RV Water Heater?
Let us first start with the basics. Atwood is a top brand that manufactures water heaters for recreational vehicles. Considering the increasing number of people living in an RV, they sell quite a lot. Water heaters are needed, especially when you are out in the woods where it is cold at night, and you need to satisfy that craving for a relaxing hot shower right before going to bed. Just like any other appliance, however, Atwood RV water heaters also need regular maintenance that allows them to last longer and cost you less money to replace.
Well, if you’re thinking that it’s too late for that, now that your heating element needs replacing, cheer up. Depending on the issue with your heating element, you can still use it. If you follow the steps below and remove your heating element, you can see the problem with your Atwood RV water heater heating element. It might only be caused by calcium build-up because of the water.
After removing the build-up on the heating element, it will be good as new. We suggest just buying a new one if the old one is a hopeless case. If not, you can always swap the two out every time the one in use gets too much calcium build-up or faces other issues. If you are intimidated by doing the replacement yourself, don’t hesitate to ask others for help or call an expert. The process of changing the heating element on the Atwood RV water heater is elaborated on below.
Steps To Change Heating Element On Atwood RV Water Heater
As stated above, it is a massive help if you have the owner’s manual with you to help you locate where the access panel of the heater is and what the things inside it do. These steps also are pretty general and can be applied to other RV water heater brands, not just Atwood. Some variations might occur, like how some have their heating elements at the access panel and others inside the RV on the other side of the access panel. It’s still part of the same RV water heater unit, though.
Now, here are the steps on how to change heating element on Atwood RV water heater:
Step #1. Removing power source and water supply
The first thing you want to do is cut off the water heater’s power supply. You could do this by unplugging the unit from the RV power source, or if there’s a visible switch, turn it off to stop you from getting electrically shocked. Next is to disconnect the water supply to the RV water heater. Once you are sure that there is no power going into the water heater, the same thing with the water, you can move on to the next step.
Step #2. Draining the remaining water
The second step is to remove all of the water inside the water heater. Take note, wait a few hours, or until the water has cooled down after removing the power source, before doing this to avoid hurting yourself with the hot water. Before draining the water, open the faucet for the hot water to remove pressure from the water heater tank. You could then go to the access panel (usually outside the RV under a plate cover) and look for a pressure relief valve (if there is any) and open it. You can then open the drain plug and let the water flow out. This process could take a while, depending on the tank size. Here’s how to drain RV water heater.
Step #3. Draining the remaining water
Finally, you can remove the cap covering the heating element, along with the screws, nuts, or bolts. The location of the heating element will vary depending on your unit. Then detach the two wires connected at the heating element and slowly take the heating element out. Replace it with the new heating element, and repeat the whole detachment process but in reverse order. Connect the water supply, and fill the tank. Look for any leaks. After this, you can turn on the power supply.
It’s A Wrap!
Thank you for reading this guide on how to change heating element on Atwood RV water heater. We would be delighted if you got value out of reading this short guide. Always keep on learning, but be safe while doing so. Call the professionals for help if you are not confident doing it yourself, or ask a buddy instead. We hope that you will use this information and knowledge yourself and share it with others if you can. You may also want to read about how to tell if element is bad in water heater and how does a dual-element water heater work. You are appreciated. Until next time!

